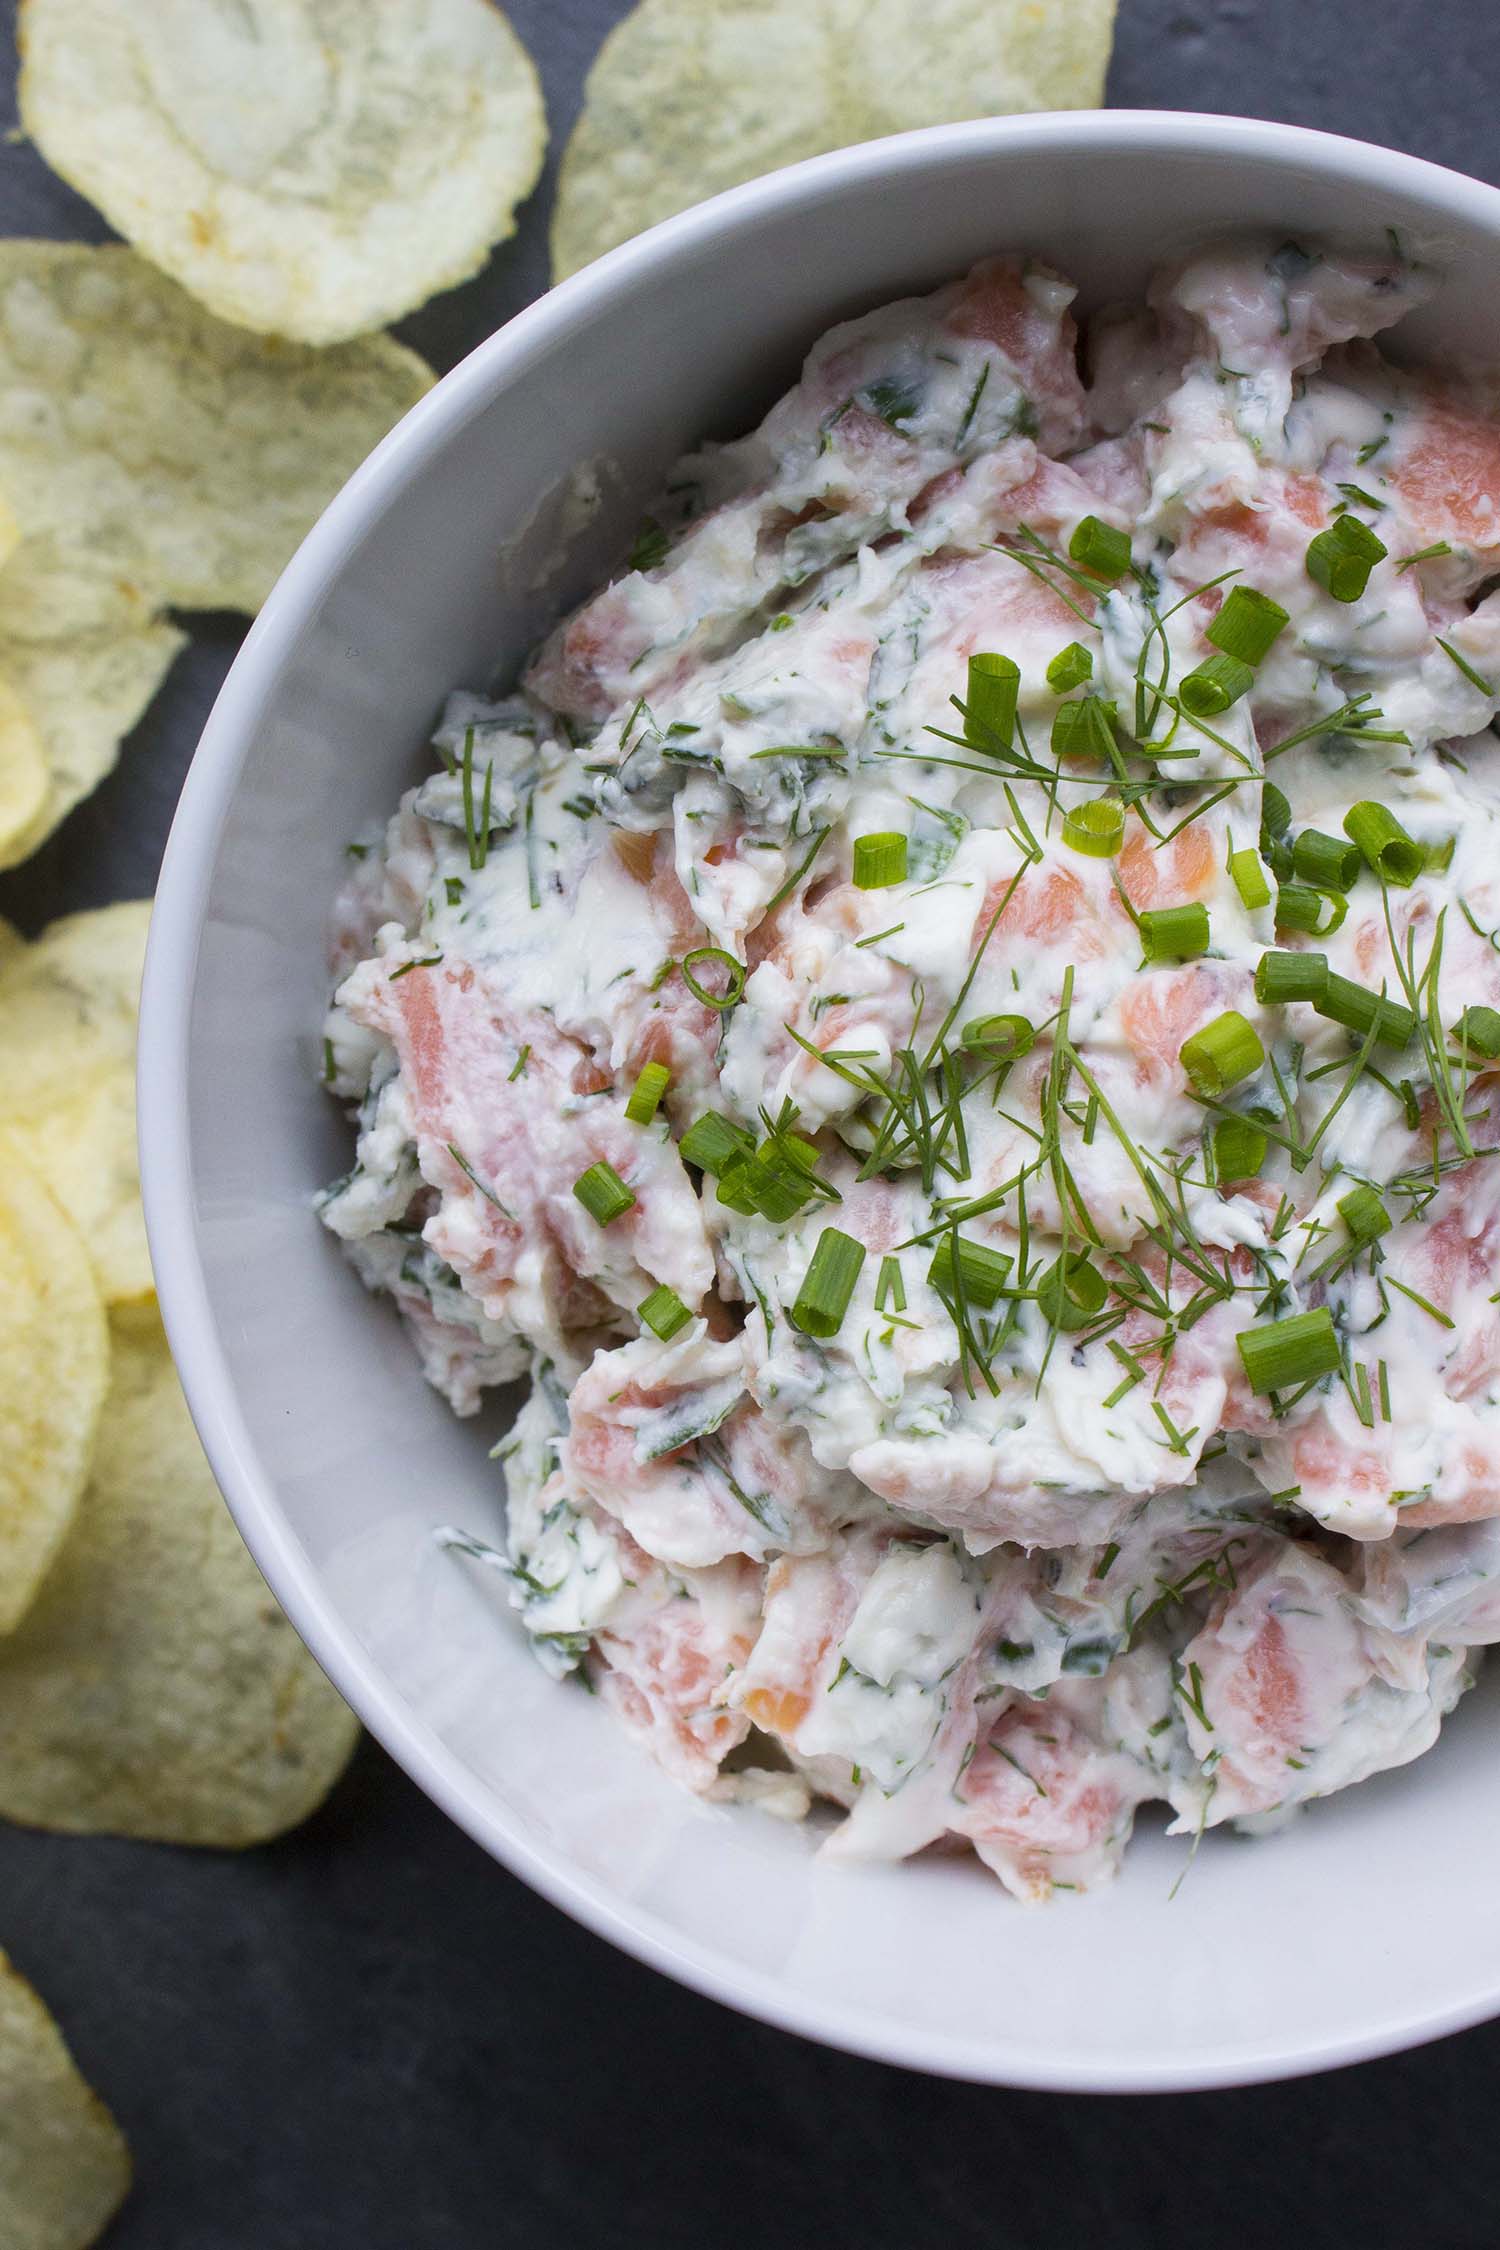
Lemony Smoked Salmon Dip

This is a recipe I think Ina would appreciate, especially when she notices that I followed her high/low rule by serving elegant smoked salmon with simple potato chips straight from the yellow Lay’s bag. This recipe also closely follows the make-ahead and low or no-cook rule by helpfully improving with time in the refrigerator and requiring a minimum of mixing and prepping to be incredible.
Last time I made this dip I whipped up a batch the night before knowing it was exactly the type of item I could hand off to literally any early arrival - up to and including a middle-schooler - and say “put this in a bowl, sprinkle it with these herbs, and pour chips around it” with utter confidence it would be perfect when guests walked through the door.

SuperBowl parties are coming up, so add this baby to your repertoire and sleep soundly smug in the knowledge you have a knock-out appetizer up your sleeve and it took almost no effort to prepare.
Lemony Smoked Salmon Dip (serves: 8-10)
Ingredients:
8 ounces smoked salmon
2 cups whole milk greek yogurt (I prefer a milder flavor like Fage here)
2-3 tablespoons fresh lemon juice
1/3 cup minced fresh chives, plus more for serving
1/3 cup tablespoon minced fresh dill, plus more for serving
Kosher salt, freshly ground pepper
Instructions:
In a medium bowl, stir together the yogurt, minced herbs, lemon juice, salt* and pepper until well combined. *Both smoked salmon and potato chips are pretty salty (duh) so go easy here!
Using your fingers, pull the smoked salmon into large pieces and fold into the yogurt mixture until evenly distributed.
Just before serving, sprinkle the top of the dip with more chives, dill and freshly ground pepper. Dip can be made 2 days ahead. Place in an air-tight container and refrigerate.
Re-written and adapted from Bon Appetit’s Lemony Smoked Trout Dip by Alison Roman.
Small Kitchen Friendly?
100%. I used a medium mixing bowl, chef’s knife, medium cutting board, and rubber spatula. The recipe is easy to eye-ball, but if you want to be precise then measuring cups & spoons.