Bruléed Grapefruit Tart

Bruléed Grapefruit Tart | Image: Laura Messersmith

Bruléed Grapefruit Tart | Image: Laura Messersmith

It’s citrus season again and the produce section is once more bursting with oranges, pink lemons, and my favorite: grapefruits. When I was younger the only way I could eat bracingly tart grapefruit was with heaping spoons of sugar. I admit, this pretty much defeats the purpose of consuming fruit in the first place, but that’s neither here nor there. As my taste buds matured I needed less and less sugar and today I sip freshly squeezed grapefruit juice without wincing.

My mood needs the bracing boost of sharp citrus. But for folks still on the fence, this bruléed grapefruit tart strikes a happy medium between lovely sweetness and teeth aching acidity by combining the milder ruby red or pink grapefruit variety with just the lightest sprinkle of toasted sugar and a simple, crisp crust.

Now, if it just tasted delicious I’d be sold, but this dessert has the extra benefit of also looking impressive. Elegant, concentric overlapping circles of grapefruit segments glistening under the melted sugar fooled my friends into thinking it came from a bakery. High praise. Imagine my enjoyment when I revealed that the entire process took place entirely in my own kitchen.

Bruléed Grapefruit Tart | Image: Laura Messersmith

Bruléed Grapefruit Tart | Image: Laura Messersmith

Bruléed Grapefruit Tart (serves 8)

 Tart Shell Ingredients:
10 tablespoons (1 1/4 sticks) unsalted butter at room temperature
1/2 cup granulated sugar
1/2 teaspoon pure vanilla extract
1 3/4 cups all-purpose flour
Pinch salt
3-4 tablespoons cold water

Filling Ingredients:
4 large ruby red or pink grapefruits
1/4 cup orange or citrus marmalade
1/3 cup finely crushed butter cookies or honey graham crackers
6 tablespoons coarse sugar

Instructions:
In a large bowl, combine the butter and sugar together with an electric hand mixer. Add the vanilla. Add the flour and salt and mix on low speed until the dough starts to come together.

Press the dough into a 9 inch round false-bottom tart pan making sure that the finished edge is flat and the corner between the sides and bottom is sharp. Refrigerate until firm, about 1-2 hours.

Meanwhile, preheat the oven to 350 degrees F.

Prick the bottom of the chilled tart shell all over with a fork, then line with parchment paper and fill with dried beans or pie weights. These steps will prevent the shell from puffing up. Bake for 20 minutes. Allow to cool slightly before removing the paper and beans.

Increase the oven temperature to 425 degrees F.

To prep the filling, cut a thin slice from both ends of each grapefruit. Place the cut end on a cutting board and cut away the peel and the white part of the rind. Slip the knife along the sides of the membrane dividing the segment to remove the slice of grapefruit.

Spread the marmalade over the partially baked crust. Sprinkle with the crushed cookies or graham crackers. Arrange the grapefruit slices over the crust in concentric circles starting from the outer edge. (You probably won’t use every single piece.) Sprinkle 3 tablespoons of the coarse sugar over the grapefruit.

Bake at 425 degrees F for 15-20 minutes or until crust is lightly browned. Remove tart from oven; turn on broiler (or pull out your kitchen torch). Sprinkle tart with the remaining 3 tablespoons sugar. Broil for 2 to 3 minutes or until sugar is lightly browned and the edges of the grapefruit just begin to singe.

Let cool to room temperature before slicing and serving.

Re-written and adapted from Better Homes and Garden’s Broiled Grapefruit Tart and Ina Garten’s Lemon Curd Tart.

Bruléed Grapefruit Tart | Image: Laura Messersmith

Bruléed Grapefruit Tart | Image: Laura Messersmith

Small Kitchen Friendly?
Yes, indeed. I used a medium mixing bowl, an electric hand mixer, measuring cups and spoons, a rubber spatula, a 9 inch false bottom tart pan, a medium cutting board, a serrated utility knife, and a kitchen torch. Parchment paper and dried beans, uncooked rice, or pie weights round out the equipment.

Bruléed Grapefruit Tart | Image: Laura Messersmith

Bruléed Grapefruit Tart | Image: Laura Messersmith

New York Black + White Cookies

New York Black and White Cookie | Image: Laura Messersmith

New York Black and White Cookie | Image: Laura Messersmith

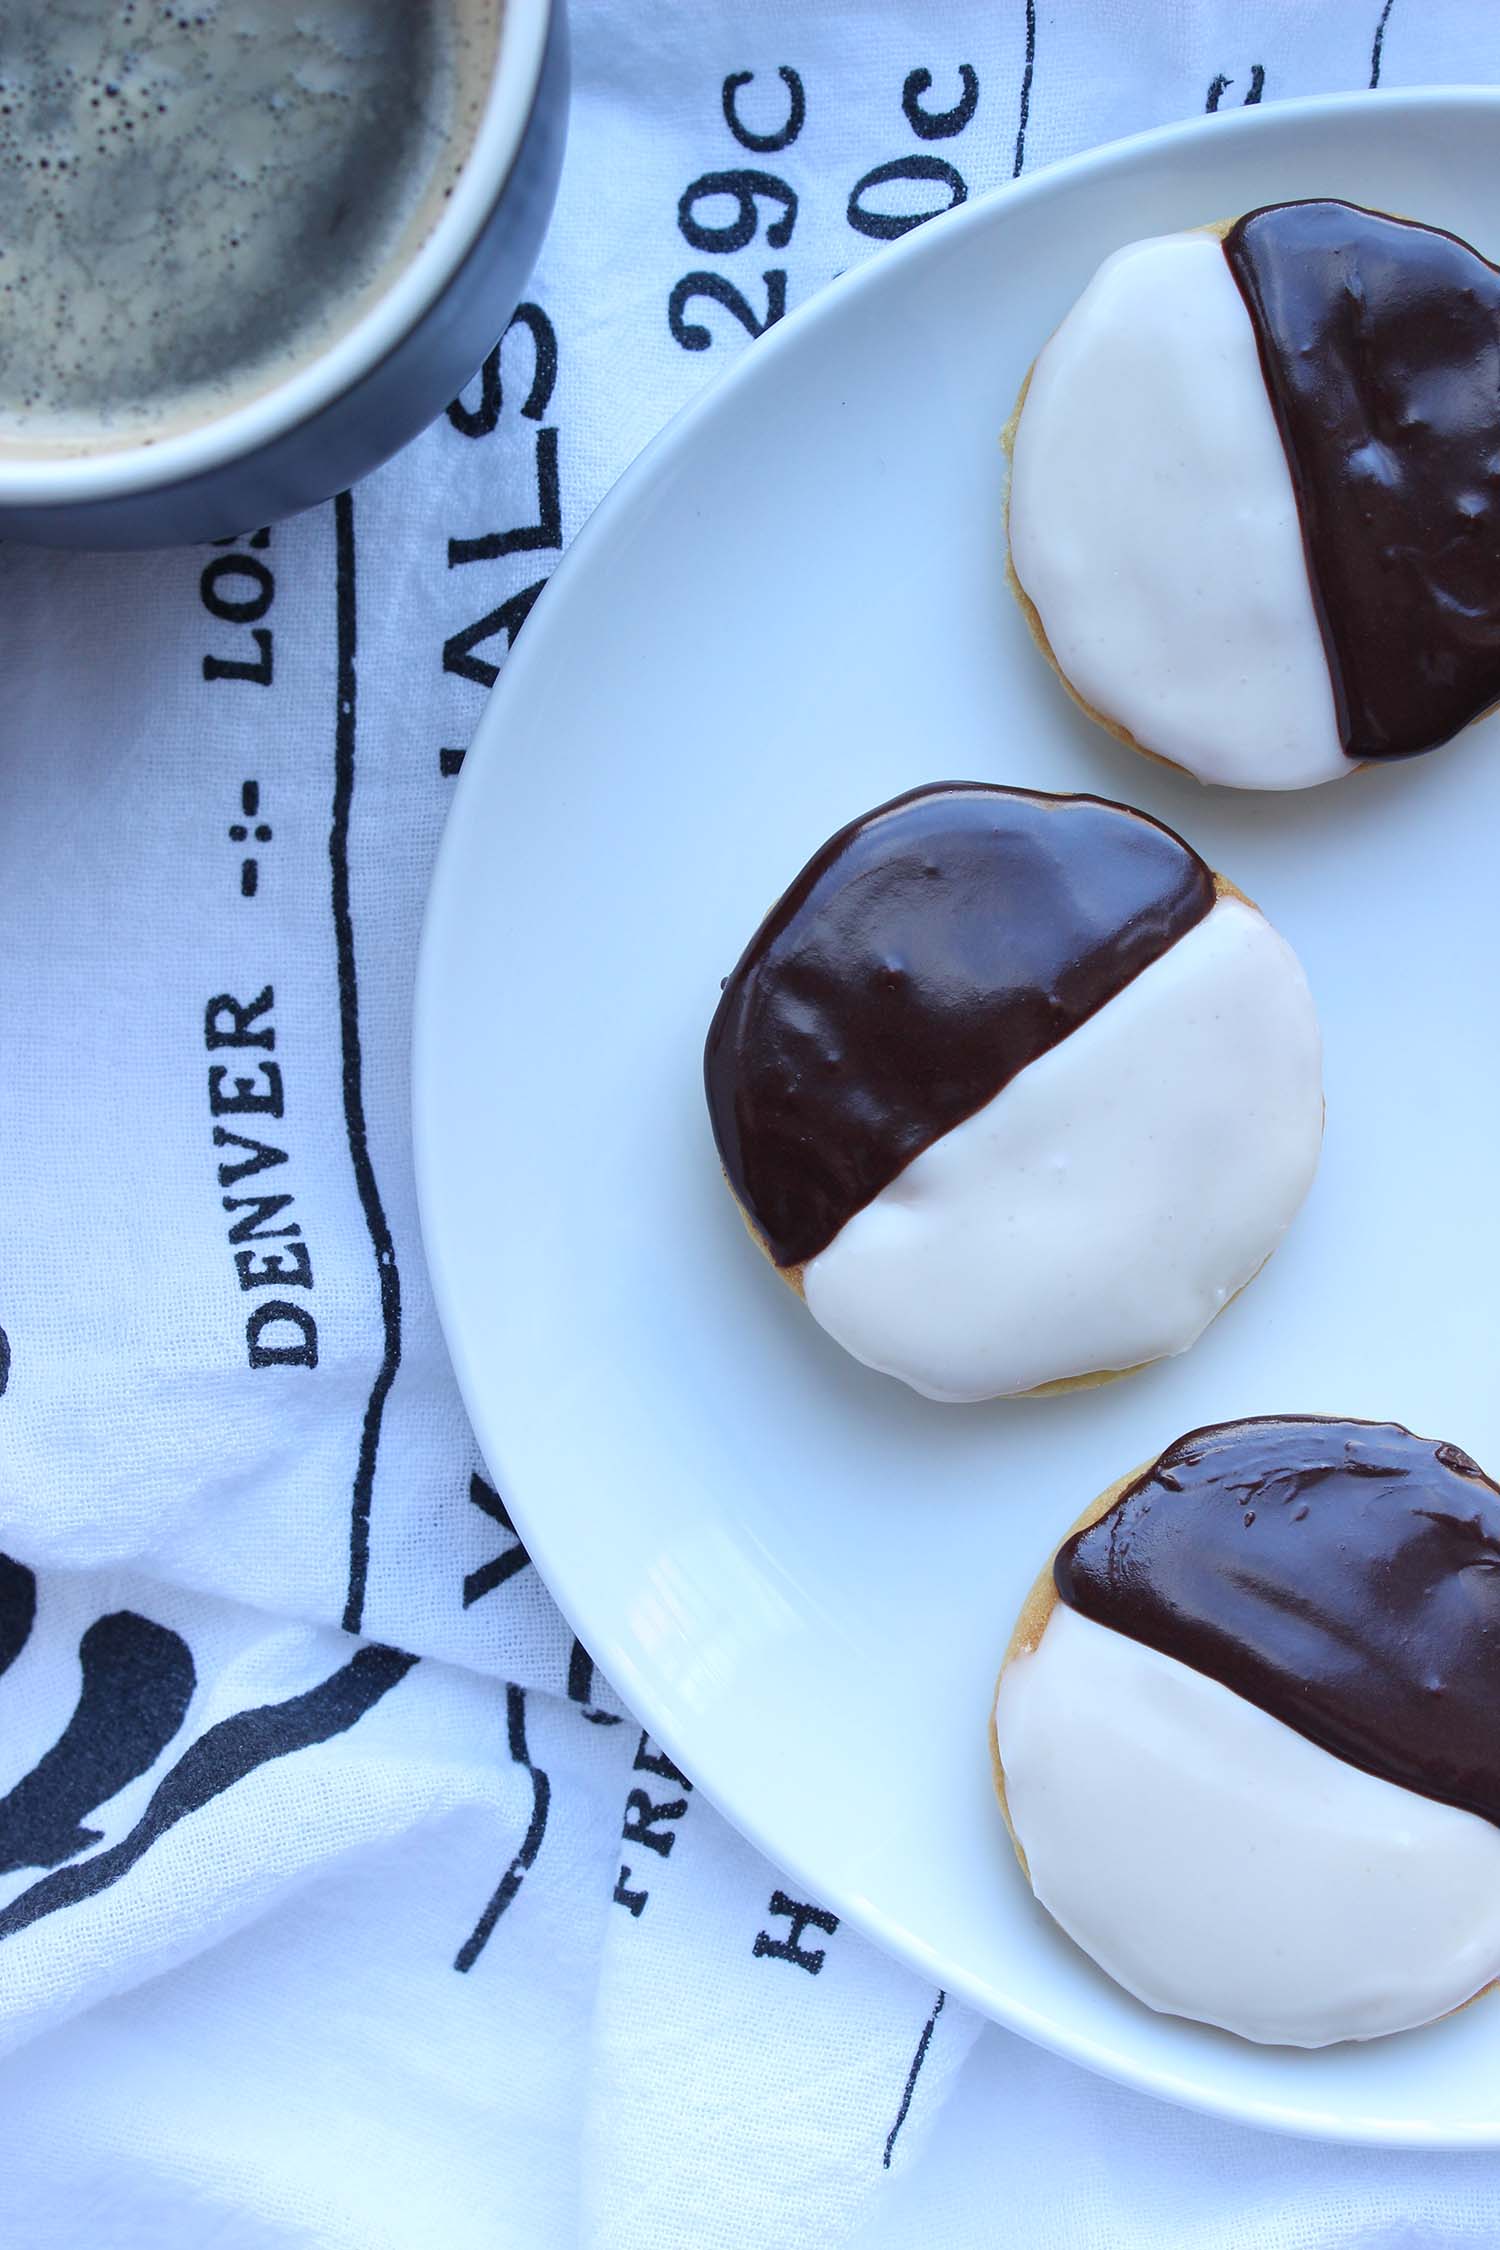
New York can lay claim to a number of iconic foods, thin crust pizza, cheesecake, bagels, and the black + white cookie. They’re found in most bodegas, grocery stores, and delis – anywhere with a bakery case, and like many things in New York, the black + white cookie requires some explanation to be fully understood and appreciated.

First, the texture is soft and fluffy like cake, not crisp or crunchy, and that’s on purpose. In my research travels I learned that this unique quality probably springs from thrifty bakers making use of leftover cake batter and turning it into an alternate product to reduce waste.

Second, there’s lots of debate over the frosting consistency, but typically it’s firm and smooth, not quite fondant and certainly thicker than icing. The type of dense, almost fudgy frosting that holds its shape once it has set and stays put even after a bite. When I see swirls or frosting that looks smoosh-able I avoid.

Third, black + whites are always frosted on the flat side. That’s right once baked, the cookies are turned bottom side up leaving the slightly curved dome underneath like the hull of a boat.

I rediscovered these cookies after a long hiatus when we moved to the city a few years ago – Upstate when I was a kid we called them “half-moon cookies” but here in the city they go by the more straightforward “black + white” – and it’s been true love ever since (both city and cookie.)

New York Black and White Cookie | Image: Laura Messersmith

New York Black and White Cookie | Image: Laura Messersmith

Three-Bite NYC Black + White Cookies (yield: 2 dozen cookies)

Cookie Ingredients:
1 1/4 cups all-purpose flour
1/2 teaspoon baking soda
1/2 teaspoon salt
6 tablespoons unsalted butter, room temperature
1/2 cup granulated sugar
1 1/4 teaspoons vanilla extract
1 large egg, at room temperature
1/3 cup buttermilk, at room temperature

Vanilla Icing Ingredients:
1 1/2 cups confectioner's sugar, sifted
1 tablespoon light corn syrup
1 teaspoon vanilla extract
5 teaspoons water
1/8 teaspoon salt

Chocolate Icing Ingredients:
1 1/2 cups confectioner's sugar, sifted
6 tablespoons cocoa powder, sifted
1/2 teaspoon instant espresso powder
4 teaspoons light corn syrup
3 tablespoons water
1 teaspoon vanilla extract
1/4 teaspoon salt

Instructions:
Preheat oven to 350 degrees F. Line two rimmed baking sheets with parchment paper and set aside.

In a small bowl, whisk the flour, baking soda, and salt together.

In a medium mixing bowl, beat the room temperature butter and sugar until creamy with a hand mixer. Add in the vanilla extract and egg and mix until well combined. Scrape down the bowl.

Add a third of the flour mixture at a time alternating with the buttermilk. Mix on low speed until just combined. The batter will be thick, fluffy, and pale yellow.

Use a cookie scoop or pastry bag to portion the cookies spacing them 1 inch apart on the prepared baking sheets.

Note on Portion: The cookies spread a bit and puff up. A 1 tablespoon portion of batter will yield a cookie about 1.5 inches in diameter.

Bake the cookies at 350 degrees F. for 6 to 8 minutes, or until the tops spring back when pressed gently and the cookies are a light golden brown around the edges. Cool completely before icing.

While the cookies are cooling, prepare the vanilla icing by whisking the confectioner’s sugar, corn syrup, water, vanilla, and salt together until very smooth. Do the same in a separate bowl for the chocolate icing, whisking together the confectioner’s sugar, cocoa, espresso powder, corn syrup, water, vanilla extract, salt.

The icing should be thin enough that it is easily spreadable, but not runny. If it seems dry, add water 1/2 teaspoon at a time; if it’s too thin, add confectioner’s sugar 1 tablespoon at a time.

Flip the cooled cookies so their flat sides are up. Use an offset spatula or piping bag to spread vanilla icing on half of the cookies, allow the icing set for a few minutes, then spread chocolate icing on the other half.

Store the cookies in an airtight container between sheets of parchment paper at room temperature for up to two days.

Re-written and lightly adapted from Yossy Arefi’s Mini Black & White Cookies via Food52.

New York Black and White Cookie | Image: Laura Messersmith

New York Black and White Cookie | Image: Laura Messersmith

Small Kitchen Friendly?
Yes, for a frosted cookie they’re relatively low-maintenance. I used a medium mixing bowl, small mixing bowl, electric hand mixer, two rimmed baking sheets, measuring cups and spoons as well as a rubber spatula, cookie scoop, offset spatula, and wire whisk.

The Verdict:
I made these for a friend and was delighted to learn that they’re her favorite cookie and were served at her wedding. They received G’s stamp of approval, which is high praise. This particular recipe is my ideal, made from simple, easily sourced ingredients. Deep, dark bittersweet chocolate married to sweet vanilla frosting on top of a cloud-like cake. Sublime and an excellent recipe to keep for the days when a black + white might not be a trip to the corner away.

New York Black and White Cookie | Image: Laura Messersmith

New York Black and White Cookie | Image: Laura Messersmith

Black Bottom Oatmeal Pie

Black Bottom Oatmeal Pie | Image: Laura Messersmith

Black Bottom Oatmeal Pie | Image: Laura Messersmith

The pie adventures of 2015 have continued into 2016 helped along by one of my favorite Christmas gifts: a copy of The Four & Twenty Blackbirds Pie Book by Emily Elsen and Melissa Elsen. The book springs from the sisters’ experiences growing up and working in their family’s restaurant back in Hecla, South Dakota and later opening an independent pie shop in Gowanus, Brooklyn named (you guessed it) Four & Twenty Blackbirds.

Mention pie or dessert to any sweets lover in the Greater New York area and the conversation will inevitably turn to this gem of a shop and their dedication to all things contained in a crust. What I love most about the book are the “uncommon” fillings they’ve developed – we’ve all had apple pie and strawberry rhubarb (classics and standbys for a reason – they’re awesome) – but when was the last time you tasted something called Salty Honey Pie, Grapefruit Custard Pie, or in this case Black Bottom Oatmeal Pie?

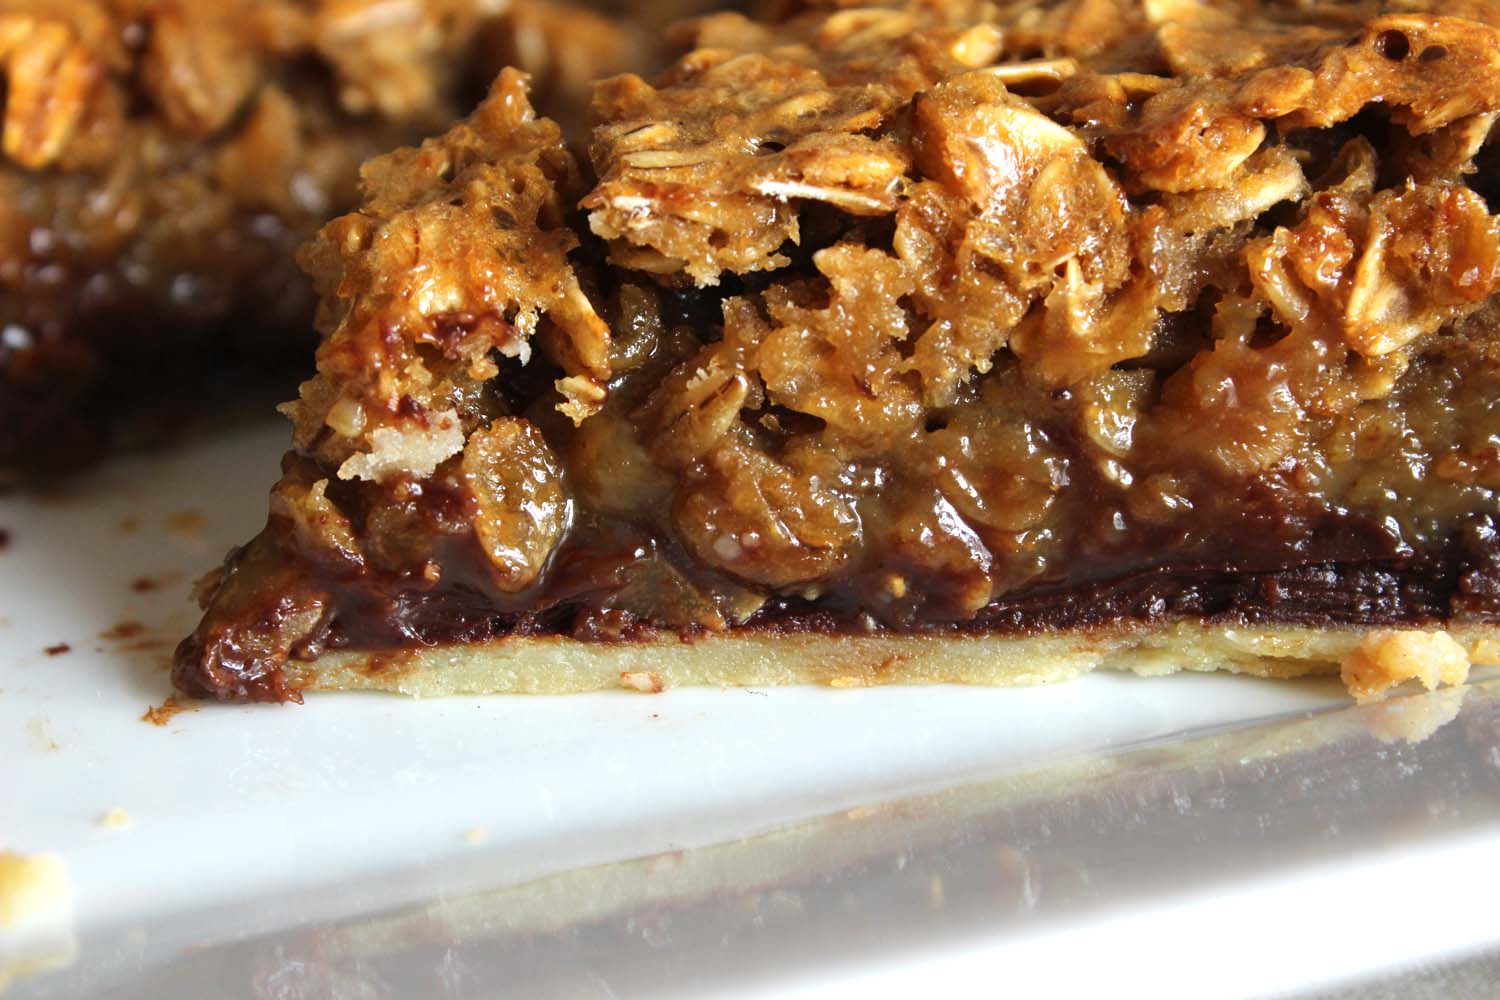
It’s a humble name for a concoction that layers all the best things about a chewy oatmeal cookie and the caramel sweetness of pecan pie in a buttery, flaky crust. And that’s before you even get to the “black bottom” part, a foundation of deep, dark chocolate ganache. Let’s pause for a moment and revel in the glory.

Please make this pie for your favorite chocolate loving people – they will forever be your biggest fans.

Black Bottom Oatmeal Pie | Image: Laura Messersmith

Black Bottom Oatmeal Pie | Image: Laura Messersmith

Black Bottom Oatmeal Pie (serves 8-10) 

Ingredients:
1 recipe All Buttah Pie Dough, par baked (recipe below)
1 1/2 cups rolled oats
1/4 cup heavy cream
4 ounces bittersweet chocolate roughly chopped
3/4 cup packed light brown sugar
1/4 teaspoon ground ginger
1/2 teaspoon kosher salt
5 tablespoons unsalted butter, melted
1 cup dark corn syrup
1 teaspoon vanilla extract
2 teaspoons cider vinegar
4 large eggs, room temperature

Instructions:
Position a rack in the center of the oven and pre-heat the oven to 350 degrees F.

Spread the oatmeal evenly on a rimmed baking sheet and toast in the oven for 10 to 12 minutes, stirring occasionally. Set aside to cool.

Reduce the oven temperature to 325 degrees F.

While the oatmeal is toasting, partially fill a medium sauce pan with water and place a heat proof bowl on top. The bowl should not touch the water. Bring the water to a boil, then place the chopped chocolate in the bowl and melt, stirring ocassionally. Once the chocolate is entirely melted, whisk in the heavy cream until the cream is incorporated and the mixture is smooth.

Use a rubber spatula to transfer the chocolate ganache into the cooled pie shell and spread evenly over the bottom. Place the shell in the freezer to set the ganache while making the filling.

In a large bowl, whisk together the brown sugar, ginger, salt, and melted butter. Add the corn syrup, vanilla, and cider vinegar and whisk to combine. Add the eggs one at a time, blending well after each addition. Stir in the cooled oats.

Pour the oat mixture over the top of the ganache layer. If the pie looks like it might over flow, then place on a rimmed baking sheet.

Bake on the middle rack of the oven for 55-60 minutes; halfway through the baking time rotate the pie 180 degrees to ensure even baking. The pie is finished when the edges are set and puffed slightly and the center is slightly firm to the touch but still has some give (like gelatin). Allow to cool completely on a wire rack, 2 to 3 hours. Serve slightly warm or at room temperature. The pie will keep refrigerated for 3 days or at room temperature for 2 days.

Re-written from Four and Twenty Blackbirds Pie Book Black Bottom Oatmeal Pie by Emily Elsen and Melissa Elsen (pg. 176)

All Buttah Pie Dough (yield: one 9 inch crust)

Ingredients:
1 1/4 cups all purpose flour, sifted
1/4 teaspoon kosher salt
8 tablespoons very cold butter, cut into 1/2-inch cubes
1/4 cup ice water, or more as needed

Instructions:
In a large bowl, stir together the flour and salt to combine. Add the diced cold butter, tossing the cubes in the flour to coat. With your fingers, rub the butter into the flour until it is the size of walnut halves (for a flaky crust) or peas (for a mealy crust).

Make a well in the center of the flour/butter mixture and add the water a few tablespoons at a time and mix with your fingers or a fork just until the dough comes together.

Gather the dough into a flat, round disc; wrap in plastic and chill well, at least 1 hour, before rolling.

Next, on a lightly floured surface, roll out the pie dough into a round crust approximately 9 ½ - 10 inches in diameter. Do your best to ensure the crust is an even thickness and a fairly regular circle in shape.

Set the crust into a 9 inch pie plate and press firmly against the sides making sure that the dough follows the shape of the dish closely. Trim the overhanging edges as needed leaving a ½ inch border. Fold the border underneath and crimp the edge, or press down onto the rim of the pie plate with a fork. Chill the un-baked crust for 30 minutes.

While the crust chills, pre-heat the oven to 425 degrees F.

The crust will be both blind and partially baked (aka par-baked) before filling. Prick the bottom and sides of the chilled crust a few times with a fork. Then, line the crust with a sheet of parchment paper or butter a piece of foil and set the buttered side against the crust. Fill the parchment paper with enough pie weights, dried beans, or uncooked rice to reach up the sides. These two steps prevent the crust from puffing up and leave a smooth crust to hold the filling.

Place the crust in the pre-heated oven and bake for 15-20 minutes. The crust will look pale and just barely baked, don’t worry it will finish baking when the filling is added. Allow the pie to cool for 5-10 minutes, then remove the pie weights and parchment paper. Fully cool the crust before filling.

Re-written from Erin McDowell’s All Buttah Pie Dough and par-baking instructions.

Black Bottom Oatmeal Pie | Image: Laura Messersmith

Black Bottom Oatmeal Pie | Image: Laura Messersmith

Small Kitchen Friendly?
Yes and no. With organization and washing of items between steps (there’s plenty of time with all the dough resting and ganache chilling) it can be done. To make the entire recipe – dough and filling I needed… 1 medium heat-proof mixing bowl, a large sauce pan, a 9 inch glass pie plate, one rimmed baking sheet, a medium cutting board, a chef’s knife, a rubber spatula, wire whisk, measuring cups (liquid and dry), and a rolling pin. Pie weights (or dried beans/uncooked rice) and parchment paper are also key for success.

The Verdict:
I don’t know how to fully convey the deliciousness in this seemingly simple pie. It’s incredible and if you can manage to share even a slice I think you could easily be considered for sainthood. It is rich and fairly sweet – although the cider vinegar and bittersweet chocolate do help keep an even keel – but just perfect for wintery days when the promise of summer fruit seems far off. I also love that since most everything is from the pantry it has a casual, no-frills vibe and it means that pie is a possibility without much warning. Always a good thing in my book.

Black Bottom Oatmeal Pie | Image: Laura Messersmith

Black Bottom Oatmeal Pie | Image: Laura Messersmith

Valencia Orange Pound Cake

Valencia Orange Pound Cake | Image: Laura Messersmith

Valencia Orange Pound Cake | Image: Laura Messersmith

Each week I follow along with Ina Garten (aka the Barefoot Contessa) and attempt to recreate one of her dishes in my tiny New York City kitchen. The catch? This is my version of cooking school and this week I’m making Orange Pound Cake for the first time. I’ll share both my successes and “challenges” along the way along with suggestions on how to adapt Ina’s recipe to a small kitchen.

Episode: “Jeffrey’s Birthday Pop-up”

The Set-up: It’s Jeffrey’s birthday and Ina is cooking him a surprise Greek themed lunch at an historic home in East Hampton

The Menu: Hummus, Spinach Pie, Raspberry Orange Trifle (featuring: Orange Pound Cake and Orange Cream)

0:42 – Jeffrey doesn’t want a birthday cake and Ina is of the opinion that no one over the age of 25 needs one anyway (did not get this memo) so she’s making individual Raspberry Orange Trifles for dessert.

1:25 – The base of the trifle is homemade Orange Pound Cake, so we’re starting with that step.

2:03 – Pro Tip #1: A light cake starts with butter (and eggs) softened to room temperature – preferably at least over night; this helps the butter cream together with the sugar and combine evenly with the eggs.

3:19 – Pro Tip #2: The second step to light cakes is alternating the dry ingredients with the wet ingredients so that both are incorporated without over mixing.

4:36 – Ina has a ton of good baking recommendations today! Here’s Pro Tip #3: Use a kitchen scale (don’t forget to tare off the weight of the pan) to make sure the batter is evenly distributed.

5:17 – I remember hearing an interview where Ina said that buttering and flouring the insides of cake pans was one of her least favorite kitchen tasks. Word. But why is it so annoying?

6:48 – We get the inside scoop on the rest of Jeffrey’s celebration – the lunch will be at the historic “Home Sweet Home” residence with flowers and period tablesetting by Ina’s friend Lilee Fell

7:11 – The pound cakes are out of the oven and receiving an additional dose of flavor via an orange simple syrup. Yum.

10:23 – Time to assemble the individual Raspberry Orange Trifles. Each piece of cake is spread with raspberry jam and then layered with fresh raspberries and Orange Cream.

11:10 – I originally assumed that the orange cream would just be whipped cream scented with orange zest, but it actually seems to be a traditional Crème Patisserie. (You can thank the Great British Bake Off for teaching me the difference.)

12:59 – Over to “Home Sweet Home” to see what Lilee is up to and we learn that non-skid pads and a second interior vase allow her to use historic vessels for flowers without fear of damaging them.

13:36 - The trifles are complete, now it’s time for a trip to Cavaniola’s in Sag Harbor for some stuffed grape leaves, olives and feta to complete the Greek Platter.

14:47 – The Greek theme comes from Jeffrey’s request to go to Greece, but I guess that wasn’t in the travel budget for the year.

18:08 – Time to work on the rest of the main course: Spinach Pie which Ina plans to serve along side the other items she bought.

19:15 – The filling of the pie is spinach, pine nuts, feta, and parmesan held together with beaten eggs, which if I remember correctly is similar to the recipe for Spanakopita.

20:37 – Instead of a traditional butter/flour based crust, the spinach pie has a few layers of phyllo dough.

21:53 – How interesting, the phyllo crust is placed in a sauté pan and then the edges are pulled together over the top to form a little purse. Ina calls it a “top knot”.

22:29 – I wonder why she used a metal sauté pan instead of a glass pie plate? I assume she has a reason…

26:34 – The Spinach Pie is out of the oven and Ina is portioning it onto the platter. It looks like this is the sort of dish that’s just as good room temperature as it is piping hot.

27:00 – Last element: homemade lemon and garlic Hummus which forms the center of the platter. A quick drizzle of olive oil here, a sprinkle of toasted pine nuts there, some rubbed dried oregano.

28:41 – Pro Tip #4: Grouping each item on the platter in big blocks of color prevents it from looking like the “proverbial dog’s breakfast.” Lilee is in charge of bringing the food to “Home Sweet Home” while Ina collects Jeffrey.

29:52 – The surprise is revealed and the two sit down to their Greek lunch. Jeffrey seems tickled by the thoughtfulness (as he should be) and true to form says this is the best lunch and dessert ever. He will live to see another year.

Final Thoughts:
Still wishing Ina had explained the sauté pan vs. pie plate choice.
Like Jeffrey, I too wonder what the original homeowners would make of the Greek menu.
I will never tire of Ina’s “dog’s breakfast” comparison.

Valencia Orange Pound Cake | Image: Laura Messersmith

Valencia Orange Pound Cake | Image: Laura Messersmith

Lessons Learned:
As has probably become obvious, I am in a citrusy mood lately so naturally the Orange Pound Cake caught my attention. It’s been awhile since I made pound cake and since this one has a slightly unusual step I figured it was a good one to refresh my memory and learn a trick or two. Here are my take aways.

Room Temperature Ingredients – If you do nothing else, but do allow your butter, eggs, and buttermilk to come to room temperature then I will consider this blog post a success. But here’s the thing, to be truly effective you really need all three at the same temperature. Consider: you’ve got soft butter all beautifully creamed together with the sugar, but then add cold eggs. The butter is going to firm up and the eggs won’t incorporate the way they should. Same deal at the buttermilk stage.

Orange Zest – I halved Ina’s recipe to make just one loaf of pound cake, but intentionally left the amount of orange zest the same (1/3 cup) as in the original recipe. I wanted the orange flavor to come through loud and clear and I think oranges (unlike lemons) can sometimes be a little wimpy. Essentially doubling the zest per cake ratio made sure that wasn’t a problem.

Orange Drizzle – Again, I am all about getting the most orange flavor I can and here I’d recommend allowing the orange juice/sugar mixture to reduce a bit so the juice is slightly more concentrated. Also, to make sure the cake soaked up as much of the syrup as possible I used a toothpick to gently poke small holes across the top of the bread. The better to absorb the drizzle.

Orange Segments – Lastly, this is more of a home-ec, waste not want not tip, but once you have the zest and juice you need there will still likely be an orange or two that can be supremed and the segments served as a topping for the pound cake. The cake is lovely on its own, but a little fresh fruit makes it just that much more special.

Valencia Orange Pound Cake | Image: Laura Messersmith

Valencia Orange Pound Cake | Image: Laura Messersmith

Small Kitchen Friendly?
Totally. I used two medium mixing bowls, an 8x3 glass loaf pan, a hand mixer, a small sauce pan, measuring cups (liquid and dry), measuring spoons, a microplane grater, and a rubber spatula. A wire rack and rimmed sheet pan will be helpful if you don’t want the drizzle or glaze to pool around the bottom of the pound cake.

The Verdict:
This Orange Pound Cake is really flipping good. The interior crumb manages to be both moist and light simultaneously, and thanks to my extra zest the orange flavor is lively and bright. I’m sure this is fabulous in a trifle, but on it’s own or with a spoonful of fresh orange segments it caps off the meal with a fresh note. I can see making this for a summer dessert just as easily as in winter.

Valencia Orange Pound Cake | Image: Laura Messersmith

Valencia Orange Pound Cake | Image: Laura Messersmith