Plum Tart
Plum Tart | Image: Laura Messersmith
Each week I follow along with Ina Garten (aka the Barefoot Contessa) and attempt to recreate one of her dishes in my tiny New York City kitchen. The catch? This is my version of cooking school and I’m making these recipes for the first time. I’ll share both my successes and um, challenges, along the way and we’ll see if I can keep up with the Contessa!
Episode: “Long Distance Dinner”
The Set-up: Ina’s cooking a dinner party menu that will be delivered to a friend’s daughter in the city.
The Menu: Filet of Beef Bourgignon, Zucchini Gratin, Plum Tart
0:34 – Ina says this dinner is for her friends’ daughter Genevieve as a post-med school exam treat. This is one legit motivator.
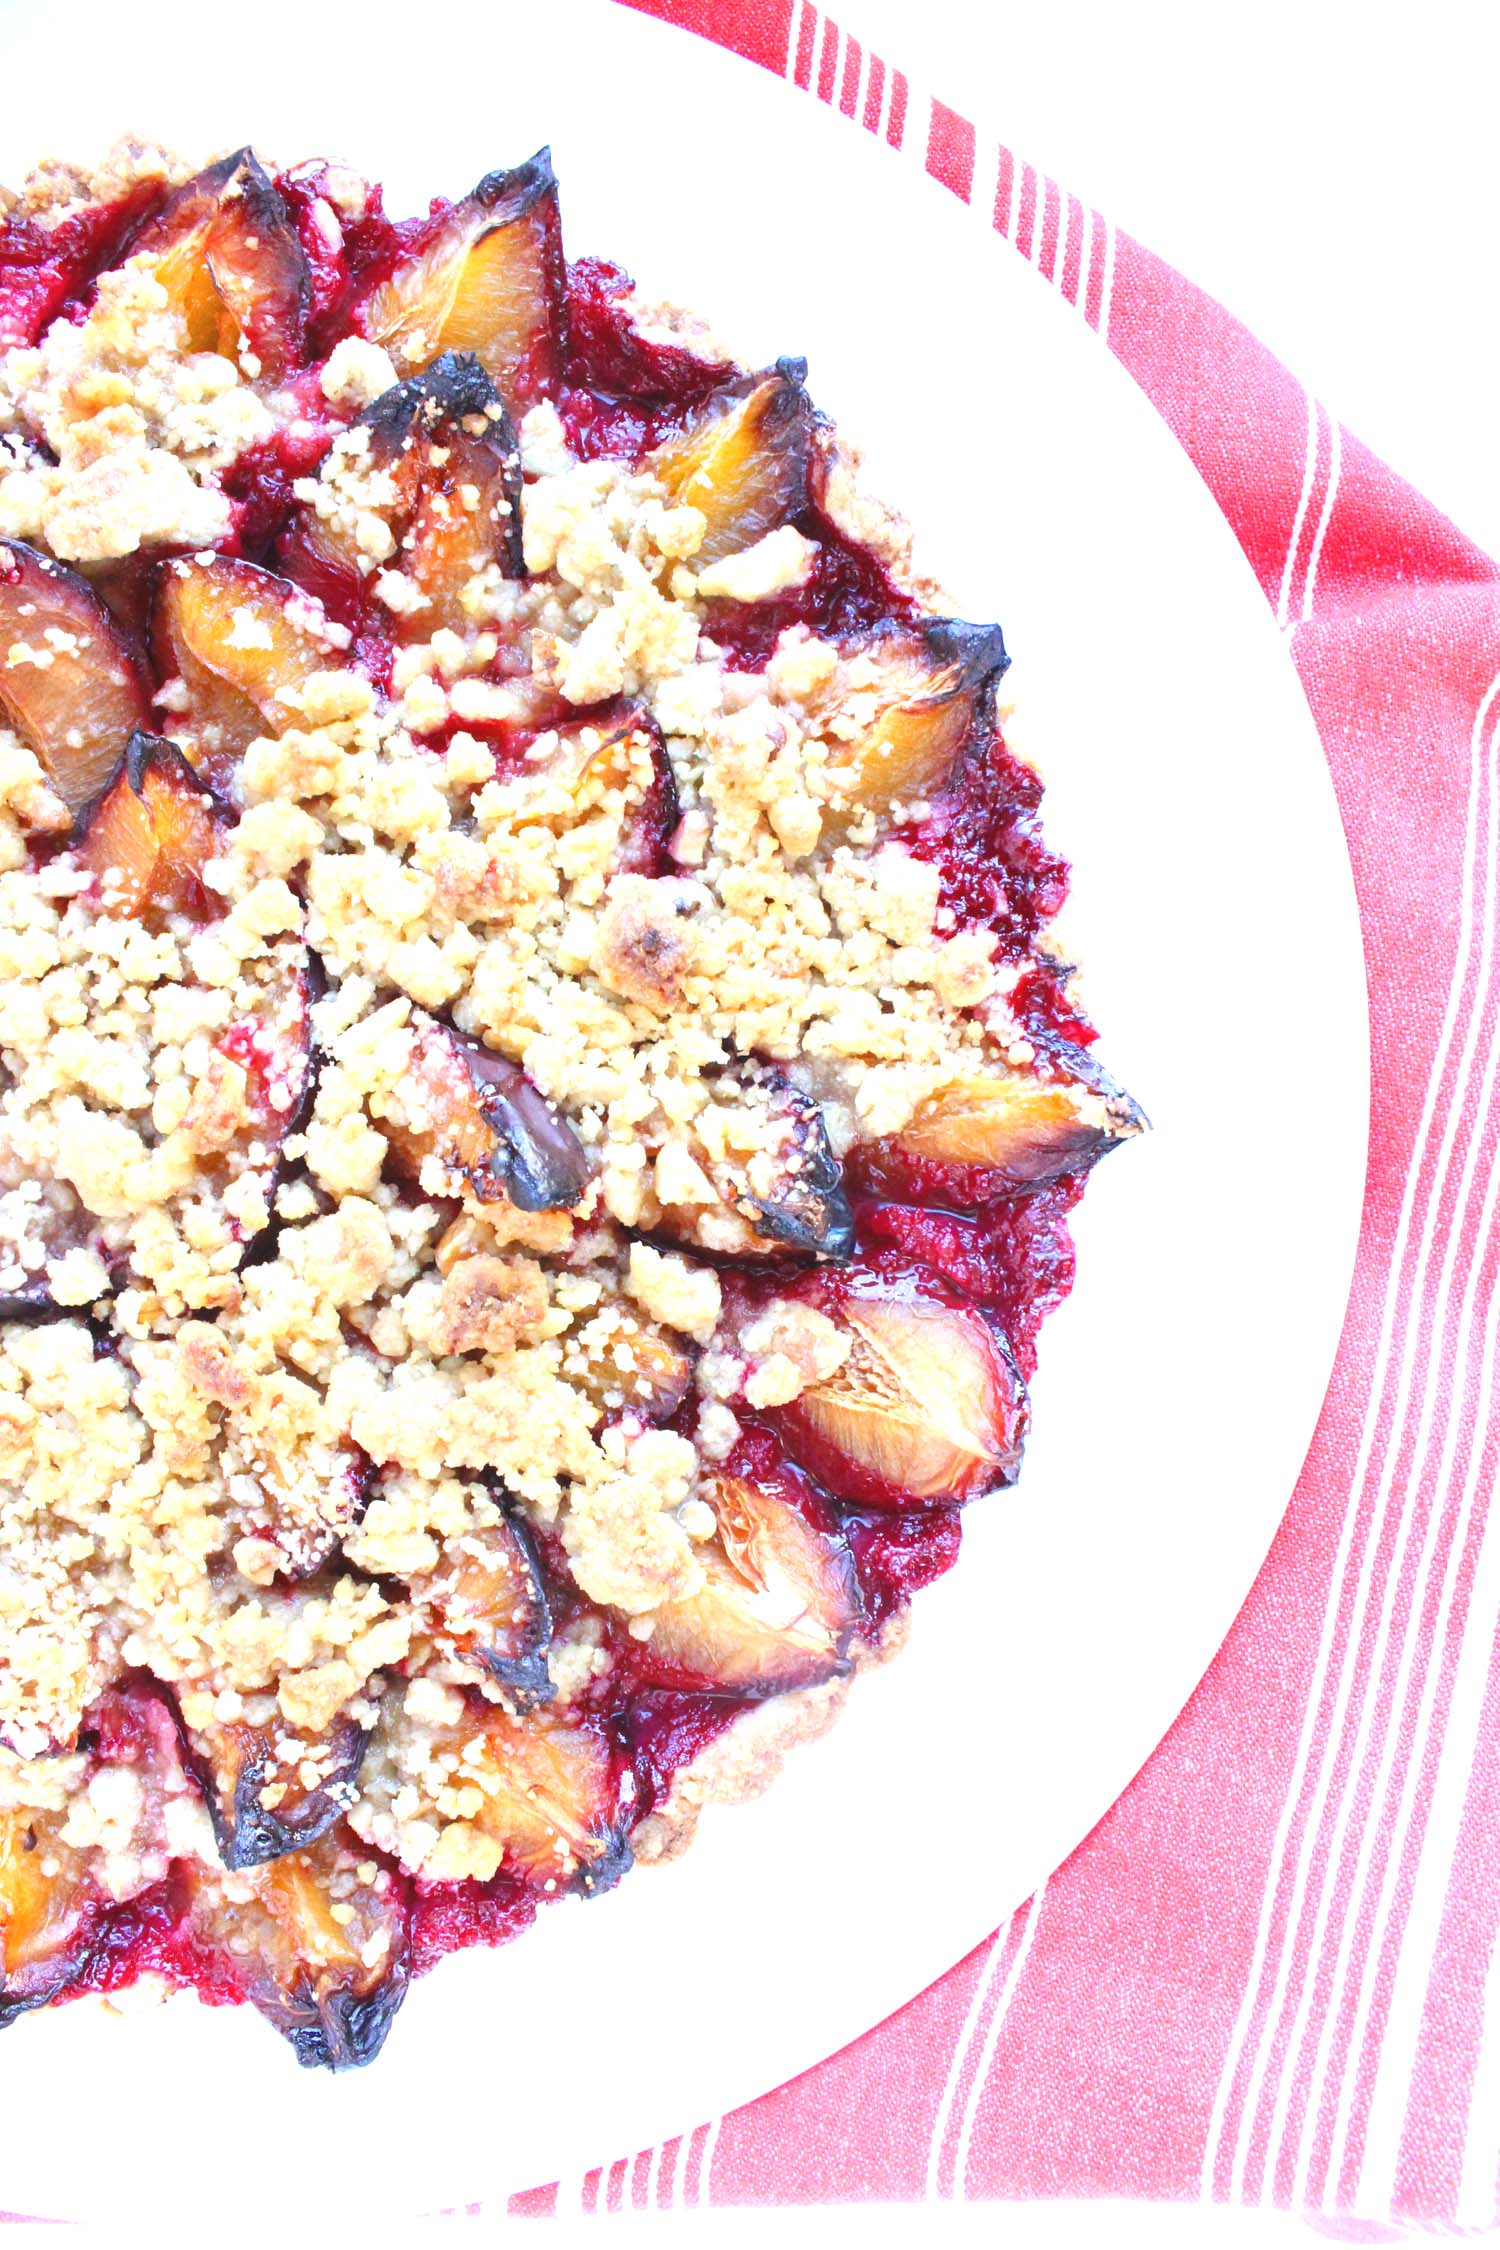
1:20 – First up is dessert, a Plum Tart with a walnut crust, which just has to be pressed into the pan. No rolling involved, you say…?
2:16 – The crust mixture is compared with a typical crumble topping – butter, sugar, finely chopped walnuts, etc. and Ina is setting some aside to put over the top of the plums.
3:42 – Pro Tip #1: Use a metal measuring cup to press the crust into place and create a sharp corner where the bottom and sides meet. Pro Tip #2: Flour the measuring cup if it sticks.
4:11 – Ina says she likes to use Italian Prune Plums when they’re in season, but today it’s just regular black plums in a lotus pattern. Basically, concentric circles of fruit wedges.
5:05 – I just realized that Ina didn’t peel the plums, 100 points in favor of fruit that doesn’t require peeling!
6:33 – Instructional Phone Call Alert! Genevieve requires guidance on flowers and wine to go with the dinner and Ina says – one color, one type of flower, and lots of them. For wine – another burgundy or similar to pair with the wine in the dish. Sounds simple enough…
9:07 – Now it’s time to work on the Zucchini Gratin which Ina particularly likes because it’s an easy way to make a vegetable dish in advance.
10:18 – So, I’ve been watching Ina on the regs for a while now and I still don’t know why nutmeg is a traditional gratin spice.
11:34 – Ina is not messing around with this gratin, cheese, breadcrumbs, and little dots of butter are in the topping. G’s party guests are going to need a post dinner walk!
12:26 – Speak of the devil: Genevieve is on the hunt for flowers, oh so casually dropping in that her “friend Ina” recommended… she walks out with $30 worth of hyacinths flown in from Holland.
13:41 – Main course time: Filet of Beef Bourgignon. I guess the fancy flowers aren’t going to be out of place since I think Ina has about $100+ worth of beef.
14:15 – Fun Fact: Ina started making this recipe when she was catering as a way to make a more rustic dish “really special.” Which is probably code for “my clients needed to impress their guests.”
18:30 – Okay, so the beef has been sliced into filets and seared, next bacon is crisped. Now for the garlic to get a quick sauté before deglazing the pan with the burgundy wine.
19:23 – Stop the presses! Ina says you don’t have to make your own beef stock, so you can free up that Saturday afternoon dedicated to the process.
20:38 – Pro Tip: Cut your vegetables on the diagonal to make a prettier shape.
21:52 – Over to Genevieve who appears to be picking up bottles of wine at random before giving up and asking the shop keeper for assistance. After hearing the menu he suggests an aligoté for white and pinot noir for red.
22:07 – Back to Ina who is thickening the sauce with a paste of flour mixed into softened butter which she recommends for thickening gravy too since it prevents lumps. Naturally, the French have a term for this it’s beurre manié.
23:59 – Stray thought… I usually try to sauté all the vegetables before adding wine, stock, etc. but Ina is doing the reverse and adding the carrots and onions to the stock. Hmmm…
25:41 – Final steps on the Filet of Beef Bourgignon adding everything back into the pan – seared filet, crisped bacon. A montage of Genevieve lighting candles and putting her flowers in water while Ina packs up all the food in a gigantic cooler.
26:28 – PS: she appears to be lending an oval Le Creuset for the party. Oh, to have extra French ovens for loaning!
27:46 – The cooler is handed over – rather easily which gives me hope that some strapping lad from the TV crew helped haul it and this one is an empty stand-in – for the trip to the city.
28:53 – Cut to Genevieve taking the reheated Zucchini Gratin out of the oven and the beef off the stove. Full accent on the French pronunciations as dinner is served. It look a-mazing.
29:49 – The New Yorker and former Bostonian in me is pleased to see that the apartment looks like a totally normal walk-up and that G’s serving “platter” for the Plum Tart is a plastic cutting board. Ahh, my twenties.
Final Thoughts:
I need to think more about ways to take classic dishes and make them special a la Ina.
A masterful lesson in “make-ahead” dinner - side, entree, and dessert.
This episode was filmed in 2006, loving the flip phone thank-you “selfie” G sends to Ina.

Plum Tart | Image: Laura Messersmith
Lessons Learned:
I know I’ve just made a plum-related dessert, but we loved the Plum Cake Tatin so much that I had to try to fit in one more before Italian Prune Plums were out of season and try Plum Tart.
Fruit Selection – I personally liked the sharp tartness of the Italian prune plums, but if you want a more straightforward, sweet dessert then I’d use regular black plums, or pluots would work too especially if you’re finding other stone fruits hard to come by at this point in the fall.
Fruit Layout/Layering – This tart looks more dramatic when the points of the slices are emerging from the shell edges a bit which has the double benefit of giving you more space for a fourth ring of plums. I cut each plum into quarters (don’t forget your stone fruit lessons!) and started with the outer edge layering in toward the center. This is pretty forgiving and since the fruit cooks down a little I took the liberty of placing the slices in fairly snugly, and sneaking any extra slices I had at the end into spots that seemed like they could use a little more fruit.
Tart Shell – The shell is comprised of a similar concoction to your typical dutch apple pie crumb topping. The butter is cold to begin with, but warms and softens a little as you work the flour, sugar and walnuts into it. Mine seemed a bit dry at first and I worried that it wouldn’t hold together, but I kept mixing and pressing the ingredients with a rubber spatula until there was only a slight haze of flour visible, and it all turned out fine.
Shell/Crumble Ratio – The recipe suggests pressing 2/3 of the crumble into the tart pan and reserving the remaining 1/3 for crumbling on top. I’d revise that to 3/4 in the pan, 1/4 crumbled on top – there were a few places in the shell where I was having trouble getting good coverage and then it seemed like I couldn’t find enough places for all the topping to go.
Baking – I placed the tart pan on a rimmed baking sheet while it was in the oven, which turned out well since the fruit juices did bubble over a bit. The time was spot on, and once it had cooled the tart lifted easily out of its outer ring and off the base onto a cake plate.
Storage – The fruit has a lot of moisture in it, so if you have one of those old-fashioned pie safes, now is the time to bust it out. Barring that, if you can stand to leave it uncovered or just very lightly with parchment paper your crust will stay crisp and firm.

Plum Tart | Image: Laura Messersmith
Small Kitchen Friendly?
Yes, completely. I used a 9” tart pan with removable base, a medium mixing bowl, small cutting board, chef’s knife, rubber spatula, measuring cups and spoons. A parchment lined baking sheet will be helpful in catching crumble & fruit juice.
The Verdict:
I actually wasn’t sure whether I would like the combination of walnuts and plums in the Plum Tart since I sometimes find walnuts a bit sharp, but in this case they add a lovely toasty mellowness and crunch to the crust. Despite the plums being essentially unseasoned – no tossing in sugar or spices – the tart still manages to be rich in a way that sneaks up on you. Just a small slice with a little scoop of vanilla ice cream is perfect. This is the perfect recipe for company, it looks so elegant but only you need to know how simple it is.

Plum Tart | Image: Laura Messersmith