Summer Fruit Crostata

Summer Fruit Crostata | Image: Laura Messersmith

Summer Fruit Crostata | Image: Laura Messersmith

Each week I follow along with Ina Garten (aka the Barefoot Contessa) and attempt to recreate one of her dishes in my tiny New York City kitchen. The catch? This is my version of cooking school and I’m making these recipes for the first time. I’ll share both my successes and um, challenges, along the way and we’ll see if I can keep up with the Contessa!

Episode: “Good Catch”

The Set-up: Ina and T.R. are having seafood dinner at his new fishing shack.

The Menu: Parker’s Fish and Chips, Tartar Sauce, Chopped Pickles, Summer Fruit Crostata

0:53 – According to Ina, T.R. is in charge of catching the fish for their dinner but we all know that’s fairly unlikely.

1:07 – Ina is cooking most everything in advance, including the Summer Fruit Crostata.

2:30 – Pro Tip#1: Use unsalted butter so that you can control the amount of salt in a recipe.

3:11 – I can’t be the only one who has a hard time moderating the water in pie crust - it always seems to be too wet or too dry! Naturally, Ina’s is perfect.

4:26 – And now ladies and gents: T.R. looking impossibly dapper in a navy Lacoste polo and admitting that he maaaay have fudged the truth when it came to his fishing experience.

5:14 – We’re back with Ina to mix up the homemade Tartar Sauce and even though she’s using dill pickles she still manages to say “cornichon.” Love it.

6:29 – Next, the Chopped Pickles, essentially the same jarred pickles that went into the tartar sauce jazzed up in pretty slices with fresh minced dill fronds.

10:42 – The crust for the Summer Fruit Crostata has rested and chilled in the fridge and now Ina is rolling it out into a perfect circle. One day that will be me!

11:53 – Now the fruit – peaches, dark plums, and blueberries. Pro Tip #2: You can remove the skin from the peaches by blanching in hot water and shocking them in an ice water bath.

12:35 – Ina has somehow, with no swearing or effort, managed to slice the peaches and the plums right off the inner pit. For my own self-esteem I’m going to chalk that up to expert fruit selection and a little TV magic.

13:19 – Hahahaha. We’re treated to intermittent shots of T.R. faithfully, but fruitlessly casting and reeling from the dock. Poor guy.

14:50 – Thank goodness! We saw the fruit piled in the middle of the crostata dough, but for a second I thought we weren’t going to get a demo of the folding technique. How could I have though Ina would hold out on us?

19:18 – Onward to make the batter for the Parker’s Fish and Chips and Ina promises us that it will be crispy and light, not soggy. Preach girl!

20:36 – Ina compares this process to making pancakes in the morning and suggests that it can all be done in advance.

21:27 – It’s official: T.R. has not caught a fish (perhaps the lack of bait on that hook?) and makes an emergency trip to the seafood market. A much more sensible approach, if you ask me.

22:12 – One last prep task before heading over to T.R.’s: cutting big Idaho baking potatoes in wedges and sprinkling them with salt, rosemary and garlic. Yum!

25:05 – Ina arrives at the fishing shack with an adorable “Yoohoo! T.R.?” and immediately calls him out on ‘catching’ the fish at the Seafood Shop.

26:33 – He’s put to work portioning the fish while Ina puts the chips in the oven to roast.

27:24 – Since the potatoes take 30+ minutes to bake they have time for a glass of wine on the dock as the sun sets. Gorgeous.

28:41 – The fish goes from plate, to seasoned batter, to hot oil and back to a paper towel-lined plate in about 6 minutes. No dredging in flour though, which is surprising.

29:10 – Ina’s kicking this one old-school, roadside stand style with newspaper cones and little containers of pickles and tartar sauce. Crostata is consumed straight from the baking sheet.

Final Thoughts:
Fish and chips seem so much more approachable after watching Ina prep them so simply.

I sincerely would love to do a little dock-sitting if it could be arranged this summer.

T.R. is the consummate rascal and Ina is so classy that even jarred dill pickles aren’t beyond her reach.

Summer Fruit Crostata | Image: Laura Messersmith

Summer Fruit Crostata | Image: Laura Messersmith

Lessons Learned:
In my continued efforts to master pies and pie crust baking Summer Fruit Crostata was another opportunity to test my skills and learn from my mistakes. It was also a chance to emulate one of the more alluring Bon Appetit covers I’ve seen. No one should be surprised that even with the concerted effort I’ve been making I still have room for improvement in this department.

Stone Fruit: Am I the only one who is incredibly intimidated by the process of slicing and removing the pits from peaches, plums & nectarines? The last time I tried the fruit was nearly unrecognizable from the divots and bruises I inflicted just trying to get a few slices free. So. Frustrating.

Before I made the crostata I carefully studied these tips & videos from Mario Batali, Southern Living, The Kitchn, and Food52 and have a few of my own.

·      Serrated/utility knife – Stone fruits are like tomatoes, the skin is tougher than you think and the flesh is really delicate. A serrated knife makes a cleaner cut with minimal pressure that might damage the fruit. Slice as close to the pit as you can to make the slices easier to remove.

·      The SEAM!!! – All the articles mentioned this, but making that first cut along the seam is more essential to successfully twisting the two halves apart than I realized. We’ve all laughed about how peaches look like little bums, well the seam is the uh, crack of the bum and demarcates the two half sections of the fruit and corresponds to the ridge around the pit. Doing this alone will help you immensely.

·      Ripe Fruit – high risk, high reward. The riper the fruit the more easily the fruit is to de-pit, but also bruises more. I’d recommend a firm and persistent, but gentle approach, especially when twisting the two halves apart. Resist pressing your finger tips in too hard and grip more with the palm.

Sweet Dough: Most of the crusts I’ve made so far have involved very little or no sugar at all just flour, butter, water, and salt. This one called for a moderate amount of white sugar; a great compliment to the juicy fruit resulting in a dessert that hovered between sweet and fresh. Fantastic.

Patience: Alas, even though I know that keeping the dough cold is an essential part of the process stubbornness and a short window for baking had me rushing. Couple a lack of time with a hot afternoon and you have a recipe for sticky dough and a frustrating rolling experience. I managed to patch the crostata together, but ideally I’d take note of the sky high temperatures outside and remember to leave myself an extra 30 minutes for chilling time.

Summer Fruit Crostata | Image: Laura Messersmith

Summer Fruit Crostata | Image: Laura Messersmith

Small Kitchen Friendly?
Yes indeed, but clear the counter so you have a place to roll the crust. For the pastry, I used a large bowl, pastry cutter, measuring cups & spoons (all reused later for the topping), a liquid measuring cup, and a rolling pin. For the fruit, I needed a separate medium bowl, serrated utility knife, and small cutting board.  (I skipped the orange zest and washed the peaches carefully so I didn’t have to take off the skin.) A baking sheet, plastic wrap and parchment paper round out the “kit.”

The Verdict:
I made Summer Fruit Crostata for friends as a post-dinner treat and based on the silence after the wedges were served, and the speed at which it was consumed this was a hit. This is a dessert that lets the fruit shine without a lot of extra business and when beautiful peaches, plums, and blueberries are in season you really don’t need to gussy them up with a ton of sugar and spices. A simple scoop of vanilla ice cream and you’re off to the races with a perfect slice of summer. Do make this crostata immediately.

Summer Fruit Crostata | Image: Laura Messersmith

Summer Fruit Crostata | Image: Laura Messersmith

Butter Braised Pork Chops with Blueberry Balsamic Sauce

Butter Braised Pork Chops with Blueberry Balsamic Sauce | Image: Laura Messersmith

Butter Braised Pork Chops with Blueberry Balsamic Sauce | Image: Laura Messersmith

After more than five years of marriage and many wonderful dinners out together I can predict with a high level of accuracy what Mike will order from a menu. Any cocktail involving bourbon, oysters on the half-shell, and a gloriously grilled pork chop will catch his attention without fail. So, when I spotted this recipe for Butter Braised Pork Chops with Pickled Blueberry Balsamic Sauce on Not Without Salt last week I knew it would be perfect for a special Friday night dinner.

To be honest, I don’t always have the best luck trying to cook pork. I like it just slightly pink in the middle, but I have a tough time gauging the time and it ends up too raw, or over-cooked and dry. Neither option is ideal, so I was excited to try Ashley’s method of pan-searing and basting with a little bit of butter. It seemed like a simple, sure-fire way to cook a juicy, flavorful, restaurant-style pork chop.

I have another confession: I adore dishes that pair fruit with a savory ingredient, so while the pork chop was geared toward Mike, the blueberry sauce was the element that really convinced me to try this recipe. Just the thought of the bright blueberries, tart with balsamic spooned over salty, meaty pork made my taste buds sing and the results more than lived up to my imagination.

Butter Braised Pork Chops with Blueberry Balsamic Sauce | Image: Laura Messersmith

Butter Braised Pork Chops with Blueberry Balsamic Sauce | Image: Laura Messersmith
Butter Braised Pork Chops with Blueberry Balsamic Sauce (serves 4)

A brief note on juniper berries. I was able to find them in the jarred spice section of my grocery store (they look like dark green peppercorns), but if they aren’t available I’d substitute a sprig or two of fresh rosemary to get the herbal, piney scent they add to the sauce.

Ingredients:
1 teaspoon juniper berries
1 whole garlic clove, peeled
3 thyme sprigs, divided
1/2 cup balsamic vinegar
1 tablespoon sugar
1 cup (6 ounces) fresh blueberries
4 bone-in pork chops
2 tablespoon olive oil, divided
6 tablespoons butter, divided
Kosher salt
Ground black pepper

Sauce Instructions:
In a small saucepan combine the juniper berries, garlic, two thyme sprigs, balsamic vinegar, sugar and 1/4 teaspoon kosher salt. Bring to a boil over medium high heat then reduce to low and simmer for 5 minutes. (Cook a few minutes longer if you want a thicker, reduced sauce.)

Place the fresh blueberries in a bowl then strain the balsamic mixture through a sieve over the fruit. Allow the berries to sit at room temperature for at least 15 minutes.

The sauce can be made up to a day in advance and refrigerated. Rewarm before serving.

Pork Chop Instructions:
Sprinkle the pork chops generously with kosher salt and ground black pepper.

Set a large stainless steel or cast iron skillet over high heat, then add 1 tablespoon olive oil and 3 tablespoons butter to the pan. When the oil shimmers and the butter sizzles carefully add the pork chops to the pan. Cook in batches if necessary to prevent crowding the pan.

Cook on one side undisturbed for 3 minutes, then flip the chops and again let the chops sear for 3 minutes.

Add the remaining 3 tablespoons butter and thyme sprig and with a large spoon start basting the chops with the butter. Flip the chops repeatedly and continue to baste. The chops are done when a thermometer inserted into the thickest part of the chop reads 135°F. This should take about 7-8 minutes.

Remove the chops from the pan, cover with foil and rest for 15 minutes. Serve with the pickled blueberry-balsamic sauce.

Slightly adapted and re-written from Butter Braised Pork Chops with Pickled Blueberry Balsamic Sauce by Ashley Rodriguez of Not Without Salt.

Butter Braised Pork Chops with Blueberry Balsamic Sauce | Image: Laura Messersmith

Butter Braised Pork Chops with Blueberry Balsamic Sauce | Image: Laura Messersmith

Small Kitchen Friendly?
Yes! I used a 8” cast iron skillet, tongs, and a long-handled spoon (key since the pan is hot!); along with a paring knife, small sauce pan, medium bowl, liquid measuring cup, measuring spoons, and a small sieve. A plate for resting and aluminum foil round out the necessary equipment.

The Verdict:
Mike was nervous about the post-sear flipping, but the tender, juicy results more than convinced him. The pork was perfectly cooked with a golden crust and deep flavor that worked beautifully with the herbal, fruity blueberries. I served the chops over wilted garlicky kale, with a handful of fresh blue berries, a few dabs of goat cheese, and a sprinkle of slivered almonds. Heaven. These pork chops are deceptively simple combining a relatively small number of ingredients with results that are far greater than the sum of the parts.  I can’t wait to try this cooking method with other fruit sauces. Peaches or cherries maybe?

Butter Braised Pork Chops with Blueberry Balsamic Sauce | Image: Laura Messersmith

Butter Braised Pork Chops with Blueberry Balsamic Sauce | Image: Laura Messersmith

Breakfast Ricotta with Berries & Maple Syrup

Breakfast Ricotta with Berries & Maple Syrup | Image: Laura Messersmith

Breakfast Ricotta with Berries & Maple Syrup | Image: Laura Messersmith

Each week I follow along with Ina Garten (aka the Barefoot Contessa) and attempt to recreate one of her dishes in my tiny New York City kitchen. The catch? This is my version of cooking school and I’m making these recipes for the first time. I’ll share both my successes and um, challenges, along the way and we’ll see if I can keep up with the Contessa!

Episode: “Cocktails and Cookies”

The Set-up: Ina and her friends are shaking up cocktails and baking up cookies today.

The Menu: Breakfast Ricotta with Berries & Maple Syrup, Jalapeno Cheddar Crackers, Blood Orange Cosmopolitans, Whole Wheat & Peanut Butter Dog Biscuits

0:44 – We’re chilling with Rob Marshall and John DeLuca again (remember them from this episode?)

1:17 – While the guys are out on the beach walking their dog Gilly, Ina is whipping up some Breakfast Ricotta with Berries & Maple Syrup.

2:23 – Ina prepped the ricotta ahead of time since it needs a little while to strain, but we get a re-cap of the process.

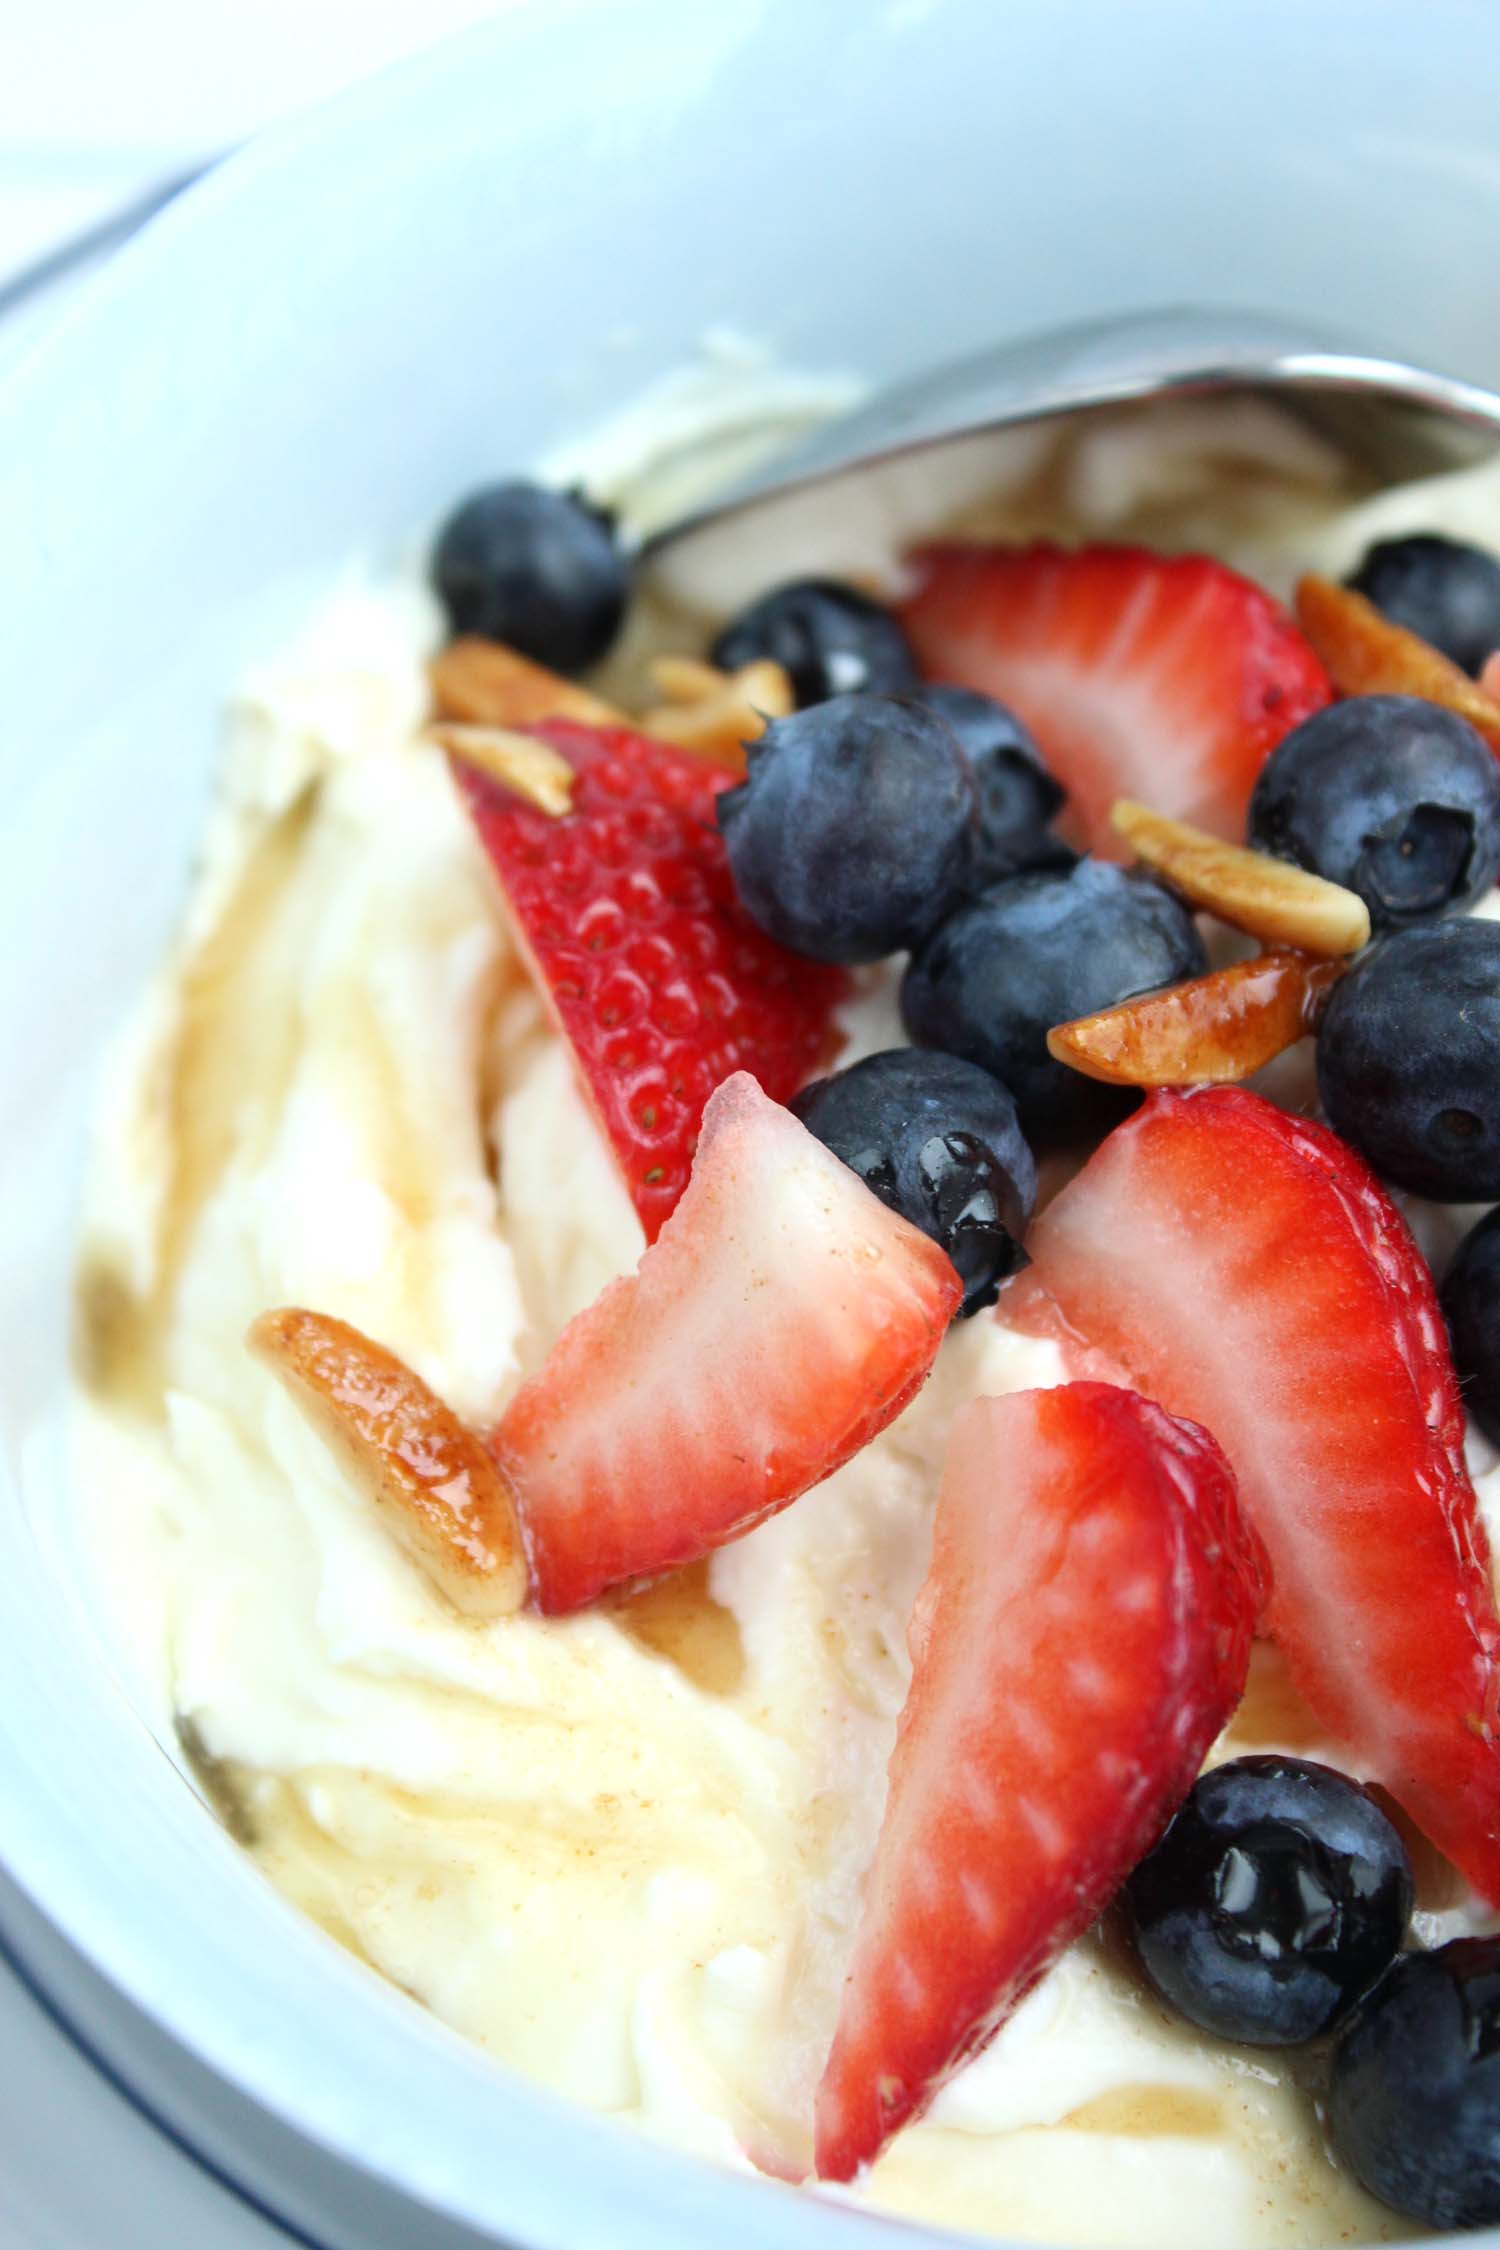
3:08 – She’s really not messing around with this breakfast, the ricotta gets a topping of maple syrup toasted almonds, fresh berries, and a slice of brioche.

4:31 – While Ina plates the ricotta she clues us in on how cool and successful Rob and John are – their movies include Chicago, Nine, and Into the Woods.

5:44 – Breakfast is served while they scheme their plans for the rest of the day – one of which involves a wicker picnic hamper full of boozy cocktail ingredients. Well played, guys.

8:12 – Time for the cookie part of the show and it turns out that the “cookies” are actually special Whole Wheat & Peanut Butter Dog Biscuits for Gilly. One lucky dog to be sure.

9:25 – Aaannd, here’s why I love Ina. Her favorite descriptor for a messy plate is a ‘dog’s breakfast’ and now she jokes they’re “finally making [one].”

10:40 – Ina takes even dog biscuits seriously and these were overwhelmingly selected by dogs the clear winner in a blind taste test vs. boxed cookies. I guess I should make some for Maddie soon…?

11:37 – Uh-oh, the guys’ dough looks better than Ina’s and she’s getting competitive. Do not try to joke her down on her own show!

12:49 – A pause in the action for a moment to clean up, and I suspect they may have taken a nip of the cocktails already because this is an epic mess and they’re giggling like 14 year old girls. Yeah, I’m jealous too.

13:11 – Seriously, they’re sword-fighting with the rolling pins now. Who else thinks a food fight is about to break out?

14:06 Ina is too crafty, she’s cutting the dough out in bone shapes, egg washing them, and sprinkling the tops with oatmeal.

18:22 – Onward to cookies for human beings in the form of Jalapeno Cheddar Crackers and they actually are almost the same process as the biscuits.

19:50 – Ina explains to Rob and John that jalapeño peppers are very hot, especially if you leave in the seeds and ribs/membranes.

20:43 – John reveals an aptitude for rolling dough into logs and it’s jokingly suggested that he may have been a bread baker in an earlier career.

21:15 – A little Knife Skills 101: saw the blade back and forth to let the edge do the work, rather than just pressing straight down.

22:57 – Prepare yourself for the most adorable taste test ever as Gilly gets a first bite of her dog cookies.

23:14 – Now there are treats for the humans as the crackers come out of the oven They really do look crunchy and golden, mmmm.

26:26 – The booze hamper has been unpacked and Step 1 of Blood Orange Cosmopolitans is to “measure 2 cups of vodka, and you’re done!”

27:43 – Followed by another cup of Cointreau, and after that just 2 cups of blood orange juice and 1/2 cup lime juice. Which means someone is going to nap under a table later.

28:35 – Next Rob whips out the most massive cocktail shaker I’ve ever seen, which Ina immediately claims as the perfect size for the number of cocktails she needs. I bet that thing holds 2 liters, easily.

29:49 – The blood orange cosmos are a gorgeous color, like a Lilly Pulitzer pink went clubbing in neon. It’s 5 o’clock somewhere….

Final Thoughts:
Maddie rarely benefits from my cooking efforts, perhaps a little love of the home-baked variety is in order?

I love the idea of making a pitcher of drinks ahead of time just shake with ice and no need to measure them out one at a time. Brilliant!

Don’t try to tell me that there was no off-camera sampling of those cosmos.

Breakfast Ricotta with Berries & Maple Syrup | Image: Laura Messersmith

Breakfast Ricotta with Berries & Maple Syrup | Image: Laura Messersmith

Lessons Learned:
I’ve made a savory version of Ina’s homemade ricotta cheese before, but I was intrigued by the idea of having a sweeter Breakfast Ricotta with Berries & Maple Syrup version for a morning meal. I also couldn’t resist the lure of almonds candied with maple syrup, especially maple syrup crafted by Merle Maple Farms (a company that's been run by family members on my mom's side for more than a century) and so here we are.

Ricotta Cooking – This seems intimidating until you’ve done it a time or two. I’d recommend using a larger pot than you think you’ll need. The milk/cream mixture needs room to bubble up, giving it space to do so means it won’t be all over your stove. Second, milk goes from zero to sixty when it’s coming to a boil, so watch like a hawk as soon as you see the first small bubbles form. Third, after the vinegar is added the mixture does look pretty terrifying, but trust the process – it works!

Ricotta Straining – I’d highly recommend setting-up the cheese cloth, sieve, and straining bowl before you start. Again, use a larger set than you think you’ll need – it’s far better to have extra space.

Maple Syrup & Almonds – As with the boiling milk, the almonds bear watching while they’re toasting in the pan. Mine turned golden brown after about 3 minutes. Something else to note: the maple syrup bubbles up quite a bit when it hits the hot pan (I used the Grade A Medium Amber in case you're curious), not to overflowing but more than I expected!

Breakfast Ricotta with Berries & Maple Syrup | Image: Laura Messersmith

Breakfast Ricotta with Berries & Maple Syrup | Image: Laura Messersmith

Small Kitchen Friendly?
Yes, especially because this recipe comes together in stages. For the ricotta I used a large sauce pan (4 quart), large fine-mesh sieve, liquid measuring cup, rubber spatula, large bowl, and cheese cloth. To make the toppings and finish seasoning the ricotta I used a small sauté pan, large bowl, measuring spoons, a small cutting board and a paring knife.

The Verdict:
For me, Breakfast Ricotta with Berries & Maple Syrup walks that line between sweet but not too sweet perfectly. The honey and vanilla push the ricotta toward mascarpone in flavor – slightly sweet, but still a hint of mild, creamy cheese – an excellent back drop for bright berries. The true revelation though: those toasty, nutty, rich maple almonds. OMG. Borderline an ice cream topping, but in small doses they’re the perfect note of indulgence. I naturally gravitate toward anything you’d typically put syrup on, but if you’re more of an omelet person like Mike, I’d skip this one.

Breakfast Ricotta with Berries & Maple Syrup | Image: Laura Messersmith

Breakfast Ricotta with Berries & Maple Syrup | Image: Laura Messersmith

Fresh Blueberry Pie

Fresh Blueberry Pie | Image: Laura Messersmith

Fresh Blueberry Pie | Image: Laura Messersmith

Each week I follow along with Ina Garten (aka the Barefoot Contessa) and attempt to recreate one of her dishes in my tiny New York City kitchen. The catch? This is my version of cooking school and I’m making these recipes for the first time. I’ll share both my successes and um, challenges, along the way and we’ll see if I can keep up with the Contessa!

Episode: “Easy as Pie”

The Set-up: Ina and Michael The Florist are trading lessons – she’s showing him pie techniques and he’s showing her flower arranging tricks.

The Menu: Raspberry Corn Muffins, Fresh Blueberry Pie, Strawberry Rhubarb Pie

0:44 – Since they’ll need fuel for the baking lesson, Ina is making Raspberry Corn Muffins to get them started.

1:07 – Ina promises that these corn muffins won’t be “dry as a bone” and she’s not messing around – between the eggs, milk, and two sticks of butter about 3 cups of liquid is mixed in. 

2:00 – Pro Tip #1: Don’t over mix the muffins or the gluten will develop and make them tough. Pro Tip #2: Use an ice cream scoop (the kind with the trigger) to portion the batter perfectly.

3:39 – We check in with Michael The Florist and he’s prepping to show Ina how to make a “hedge” flower arrangement. 

4:26 – Back with Ina to pipe raspberry jam into the corn muffins. I can see that my lack of a piping bag is holding me back from filling things up with jam…

5:11 – Michael The Florist arrives and is immediately handed a freshly baked, freshly be-jammed muffin. I bet they’re still warm and I reeeally wish I had one right now.

9:13 – Pastry Lesson #1: Lighten the flour and level it off in the measuring cup. If you forget how many you’ve put in, start over. (Not that I’ve ever had to do that…)

10:01 – Pastry Lesson #2: Really cold butter, really cold shortening, really cold water. If you’re me you’re wondering how on earth she diced shortening and then you’re remembering that they make it in sticks now. Progress in our time!

11:19 – Pastry Lesson #3: Quickly collect the dough into a ball, wrap it in plastic and chill it in the refrigerator for 30 minutes to let it relax. Keeping everything cold makes the butter release steam when it hits the hot oven.

12:48 – Now we’re on to the filling of the pies. Ina is working on the Strawberry Rhubarb and Michael The Florist is rocking Fresh Blueberry.

13:30 – Both fillings need a thickening agent to help the fruit and juices stay together in the pie. The Strawberry Rhubarb calls for cornstarch, while the Fresh Blueberry uses flour. I wonder why the difference? This calls for some research…

14:31 – Pastry Lesson #4: Generously flour the surface before rolling out the crust to make sure it doesn’t stick.  

15:16 - Pastry Lesson #5: Roll the dough from the center turning the crust periodically to form an even circle.

16:43 – Pastry Lesson #6: If the edge cracks, brush it with just a little with water and press the pieces back together.

17:05 – Pastry Lesson #7: Hold the pie plate you’re using over the rolled dough to help determine if it’s large enough. Then use the rolling pin to help lift the crust into the pan and ease the dough into the bottom. Don’t stretch it!

18:39 – Ina is doing a lattice top on her pie and Michael The Florist is doing a plain top. I still haven’t attempted a lattice top, but it seems far more do-able than it used to.

22:24 – Pastry Lesson #8: Glue the top and bottom crust together with egg wash and then press together with a fork, or by folding the bottom over the top and crimp the dough between two fingers so that it forms a ruffle along the edge.

23:46 – Time for the flower lesson, and in case you’re wondering, Michael The Florist is wearing a peony colored sweater that matches the blooms perfectly.

24:52 – A hedge arrangement seems to be long rectangles of that green foam flower oasis in low trays that are then covered with the flowers like a topiary. And now I want them to make one with boxwood.

25:29 – Flower Lesson #1: Choose a consistent color palette in a variety of shapes and textures. Flower Lesson #2: Place the larger flowers first then fill in with smaller blooms working from hydrangeas, peonies down to garden and spray roses.

26:03 – Flower Lesson #3: To ensure guests can see over the flowers put your elbow on the table and don’t make the arrangement any taller than your wrist. This is a brilliant hack. Flower Lesson #4: Avoid heavily scented flowers like freesia and lilies, they compete with the food!

27:44 – Wedding-ish flowers are done, but instead of cake Ina and Michael The Florist gleefully decide they’ll celebrate with “Pie!!!” instead.

28:57 – A toast with forkfuls of flaky pastry and fruit before Michael The Florist tries to abscond with the rest of the Fresh Blueberry. Ina resists tackling him to the ground, but just barely.

Fresh Blueberry Pie | Image: Laura Messersmith

Fresh Blueberry Pie | Image: Laura Messersmith

Final Thoughts:
I’ve been trying to up my pie game this year (2015, The Year of the Pie) and I truly am finding that practice is leading to better results.

This pie making tutorial is right on point for summer – so much fruit, so many pies to make!

Who else thinks that both Ina and Michael The FloristTM will continue to outsource their flower and pie making needs, respectively?

Lessons Learned:
I’ve basically only ever made apple pie, which now that I read it in black and white sounds kind of sad, so Fresh Blueberry Pie was a new challenge and pie crust is always a challenge for me, although I’m getting better! I took a class with Food52’s pie whisperer, Erin McDowell last December and my efforts with this recipe were definitely influenced by the wisdom she shared.

Dough Recipe – Confession time: shortening creeps me out, and while I’ve used it in pie crust before I wanted to try making a crust with butter only. Or, more accurately Erin McDowell’s All Buttah Pie Dough doubled for two 9” crusts.

Dough Mixing – Ina’s technique of using a food processor to mix the dough is amazingly easy, so much better than using a pastry cutter and trying to mix it by hand, although it certainly can be done.

Soggy Crust Avoidance Step #1 – I love fruit pies, but soggy bottom crust, not so much. If you’re with me on this, then I have fantastic news!!! I tried a new technique called par-baking – Erin’s guidance on the subject is detailed here – but in a nutshell it means partially baking just the lower crust (10-12 minutes was about right – you don’t want the edge to get too dark when it bakes again later.)

Soggy Crust Avoidance Step #2 – I also brushed the par-baked crust with egg wash before filling it with the blueberries, a recommended step for further preventing the crust from absorbing too much juice. The result: a crisp, firm bottom crust that has enough structural integrity to hold the slice together! [choirs of angels sing…] It does take an extra step, but for me it’s worth it.

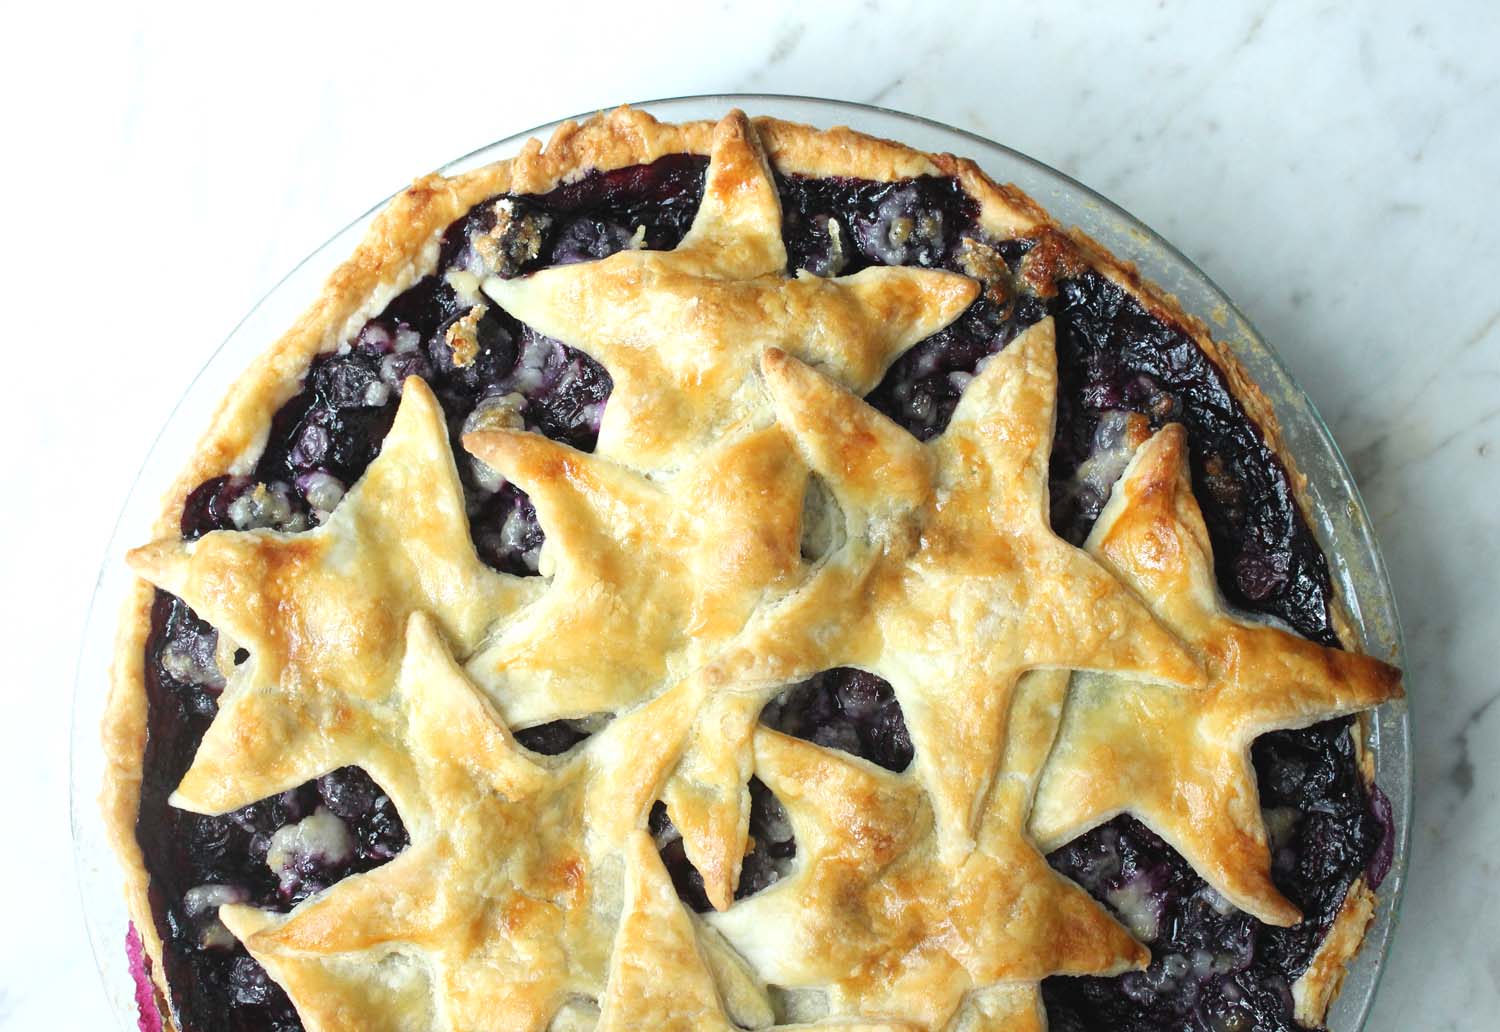
Fancy Top Crust – I admit, I got a little fancy here, again Erin is responsible for giving me ideas, but here’s the good news: this is at least as easy as making a top crust and possibly a little easier. I just rolled out the dough to about the size I’d need for the top crust, then used large star-shaped cookie cutters. I free-form layered the stars on top of the blueberries and brushed each layer with egg wash to help the pieces stick together. That’s it!

Fresh Blueberry Pie | Image: Laura Messersmith

Fresh Blueberry Pie | Image: Laura Messersmith

Small Kitchen Friendly?
More than most pies, no peeling or slicing required! For the pastry I used a 6 cup food processor, 9” pie plate, measuring cups and spoons, rolling pin, cookie cutter, a utility knife, a small cutting board, pastry brush and a small bowl. Additionally, for the filling I needed a medium mixing bowl, microplane zester, and rubber spatula. Plastic wrap, parchment paper, and pie weights (dry rice or beans work perfectly and can be re-used) round out the necessary items. 

The Verdict:
As you can imagine a Fresh Blueberry Pie with a crisp, all buttah crust is pretty darn amazing. The blueberries are perfectly complimented by the gentle zing of lemon zest and turn just this side of a molten blueberry preserve. I served it to friends who had come over for Saturday night cards – we’re channeling our parents and trying to learn bridge. Perfect on it’s own, even more delicious with a scoop of vanilla ice cream. Maybe for this weekend or the Fourth of July?

Fresh Blueberry Pie | Image: Laura Messersmith

Fresh Blueberry Pie | Image: Laura Messersmith