Homemade Marshmallows

Homemade Marshmallows | Image: Laura Messersmith

Homemade Marshmallows | Image: Laura Messersmith

Each week I follow along with Ina Garten (aka the Barefoot Contessa) and attempt to recreate one of her dishes in my tiny New York City kitchen. The catch? This is my version of cooking school and I’m making these recipes for the first time. I’ll share both my successes and um, challenges, along the way and we’ll see if I can keep up with the Contessa!

Episode: “Just Candy”

The Set-up: Ina is working on ways to display and gift candy, so she invited Dylan Lauren of Dylan’s Candy Bar to help!

The Menu: Homemade Marshmallows, Winter Squash Soup, White Chocolate Bark

0:22 – Ina’s not really a fan of store-bought marshmallows, but says that making them at home was a revelation. High praise, indeed.

1:15 – Anything involving packets seems to make me nervous, whether its gelatin or yeast. I need to conquer that anxiety!

2:29 – I didn’t really think about this, but since these are going to be white marshmallows it’s important to use light corn syrup.

3:31 – Good call on recommending that children be really carefully supervised if they’re going to help. Molten sugar is not a toy.

4:04 – Pro Tip #1 – Use a heat proof measuring cup with a spout to help pour the hot sugar syrup into the mixer.

5:18 – We visit Dylan Lauren at her store, Dylan’s Candy Bar, to learn some tricks for displaying candy. Idea #1: a topiary shaped like a witch’s hat. Oh, I forgot to mention – this is a Halloween episode….just a bit late.

6:34 – Back to Ina, who manages the marshmallow mixture without too much trouble. Pro Tip #2: a generous dusting of confectioner’s sugar helps to keep the marshmallows from sticking too much.

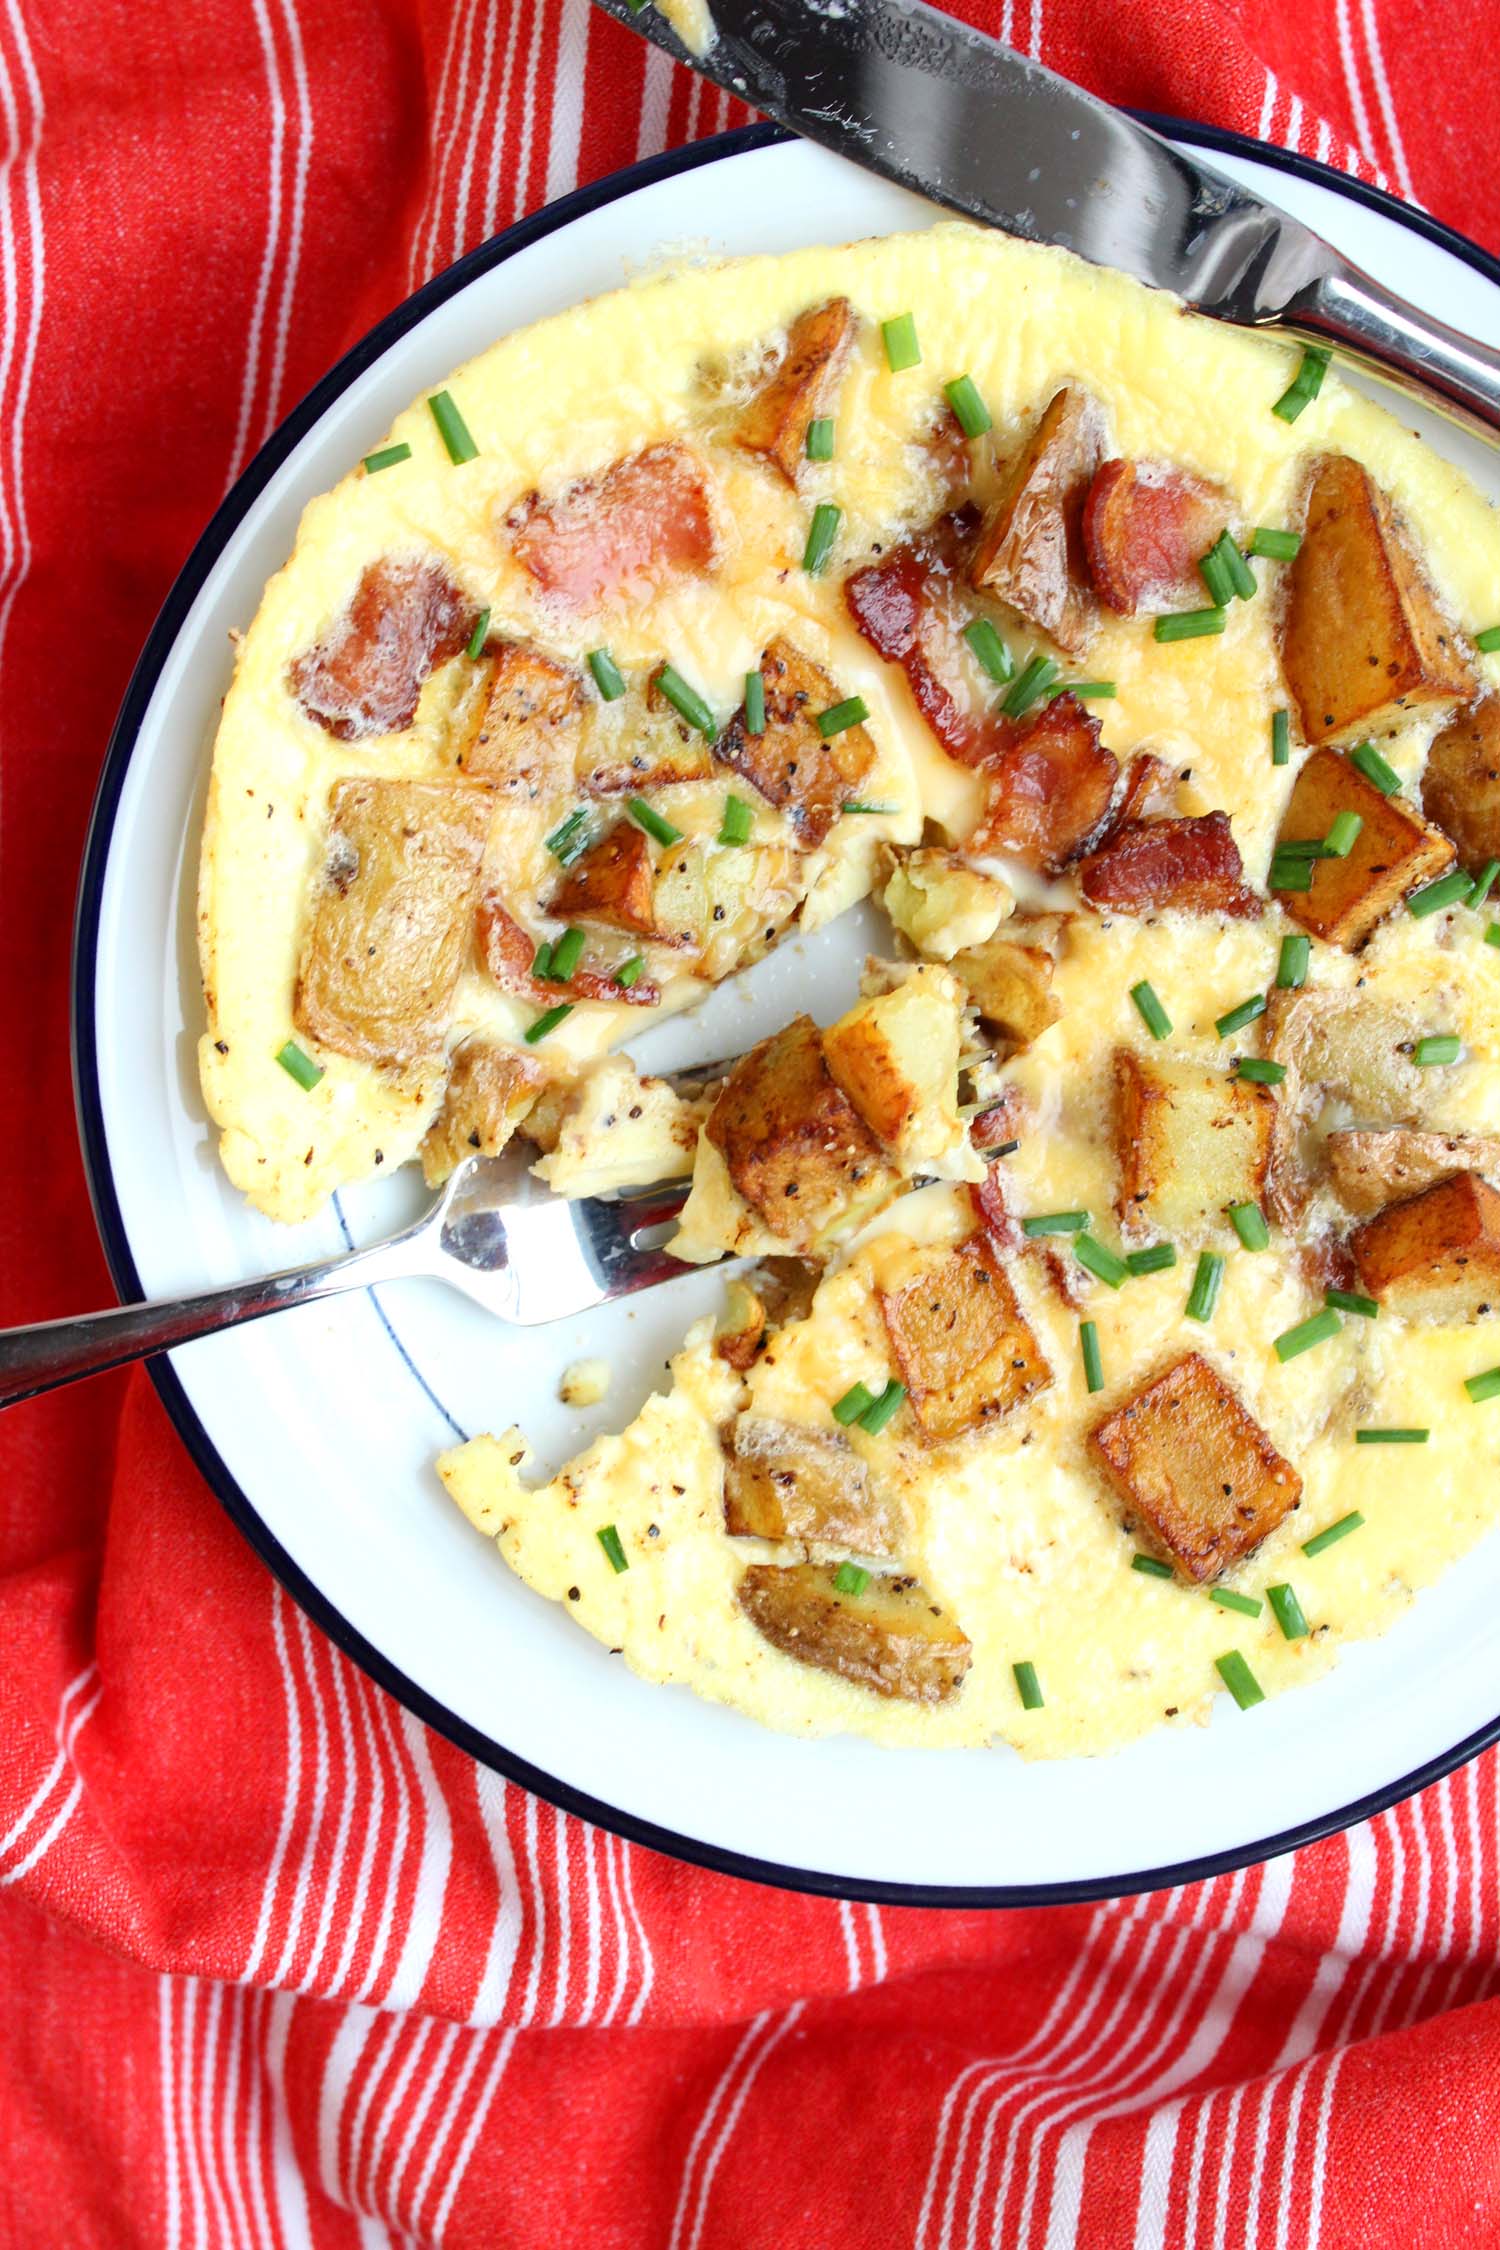
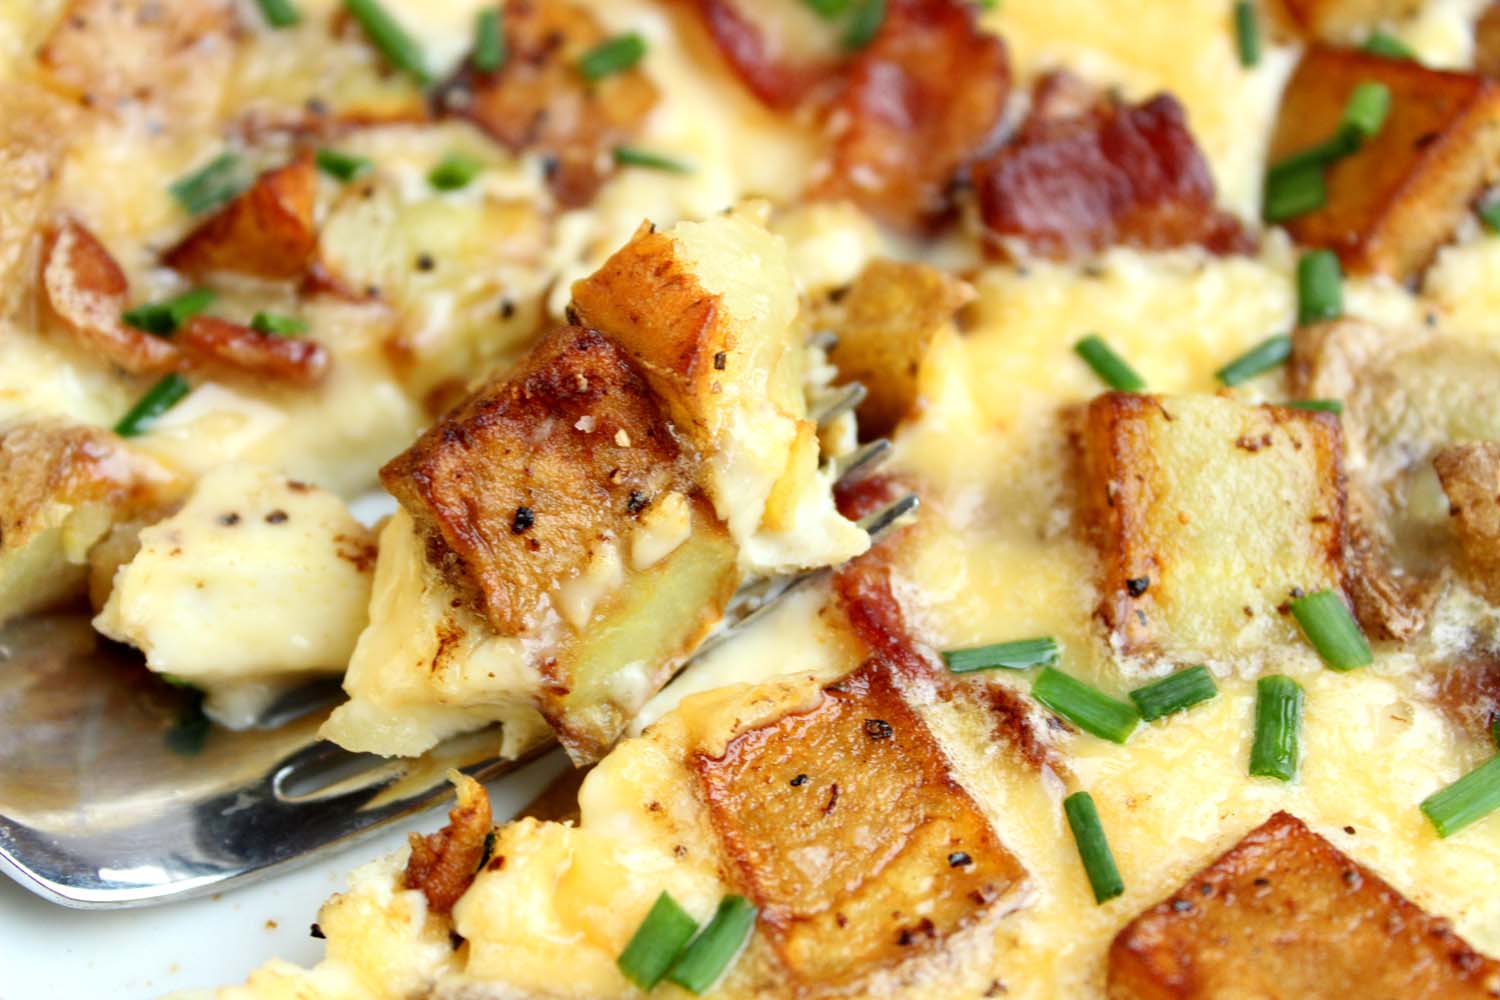
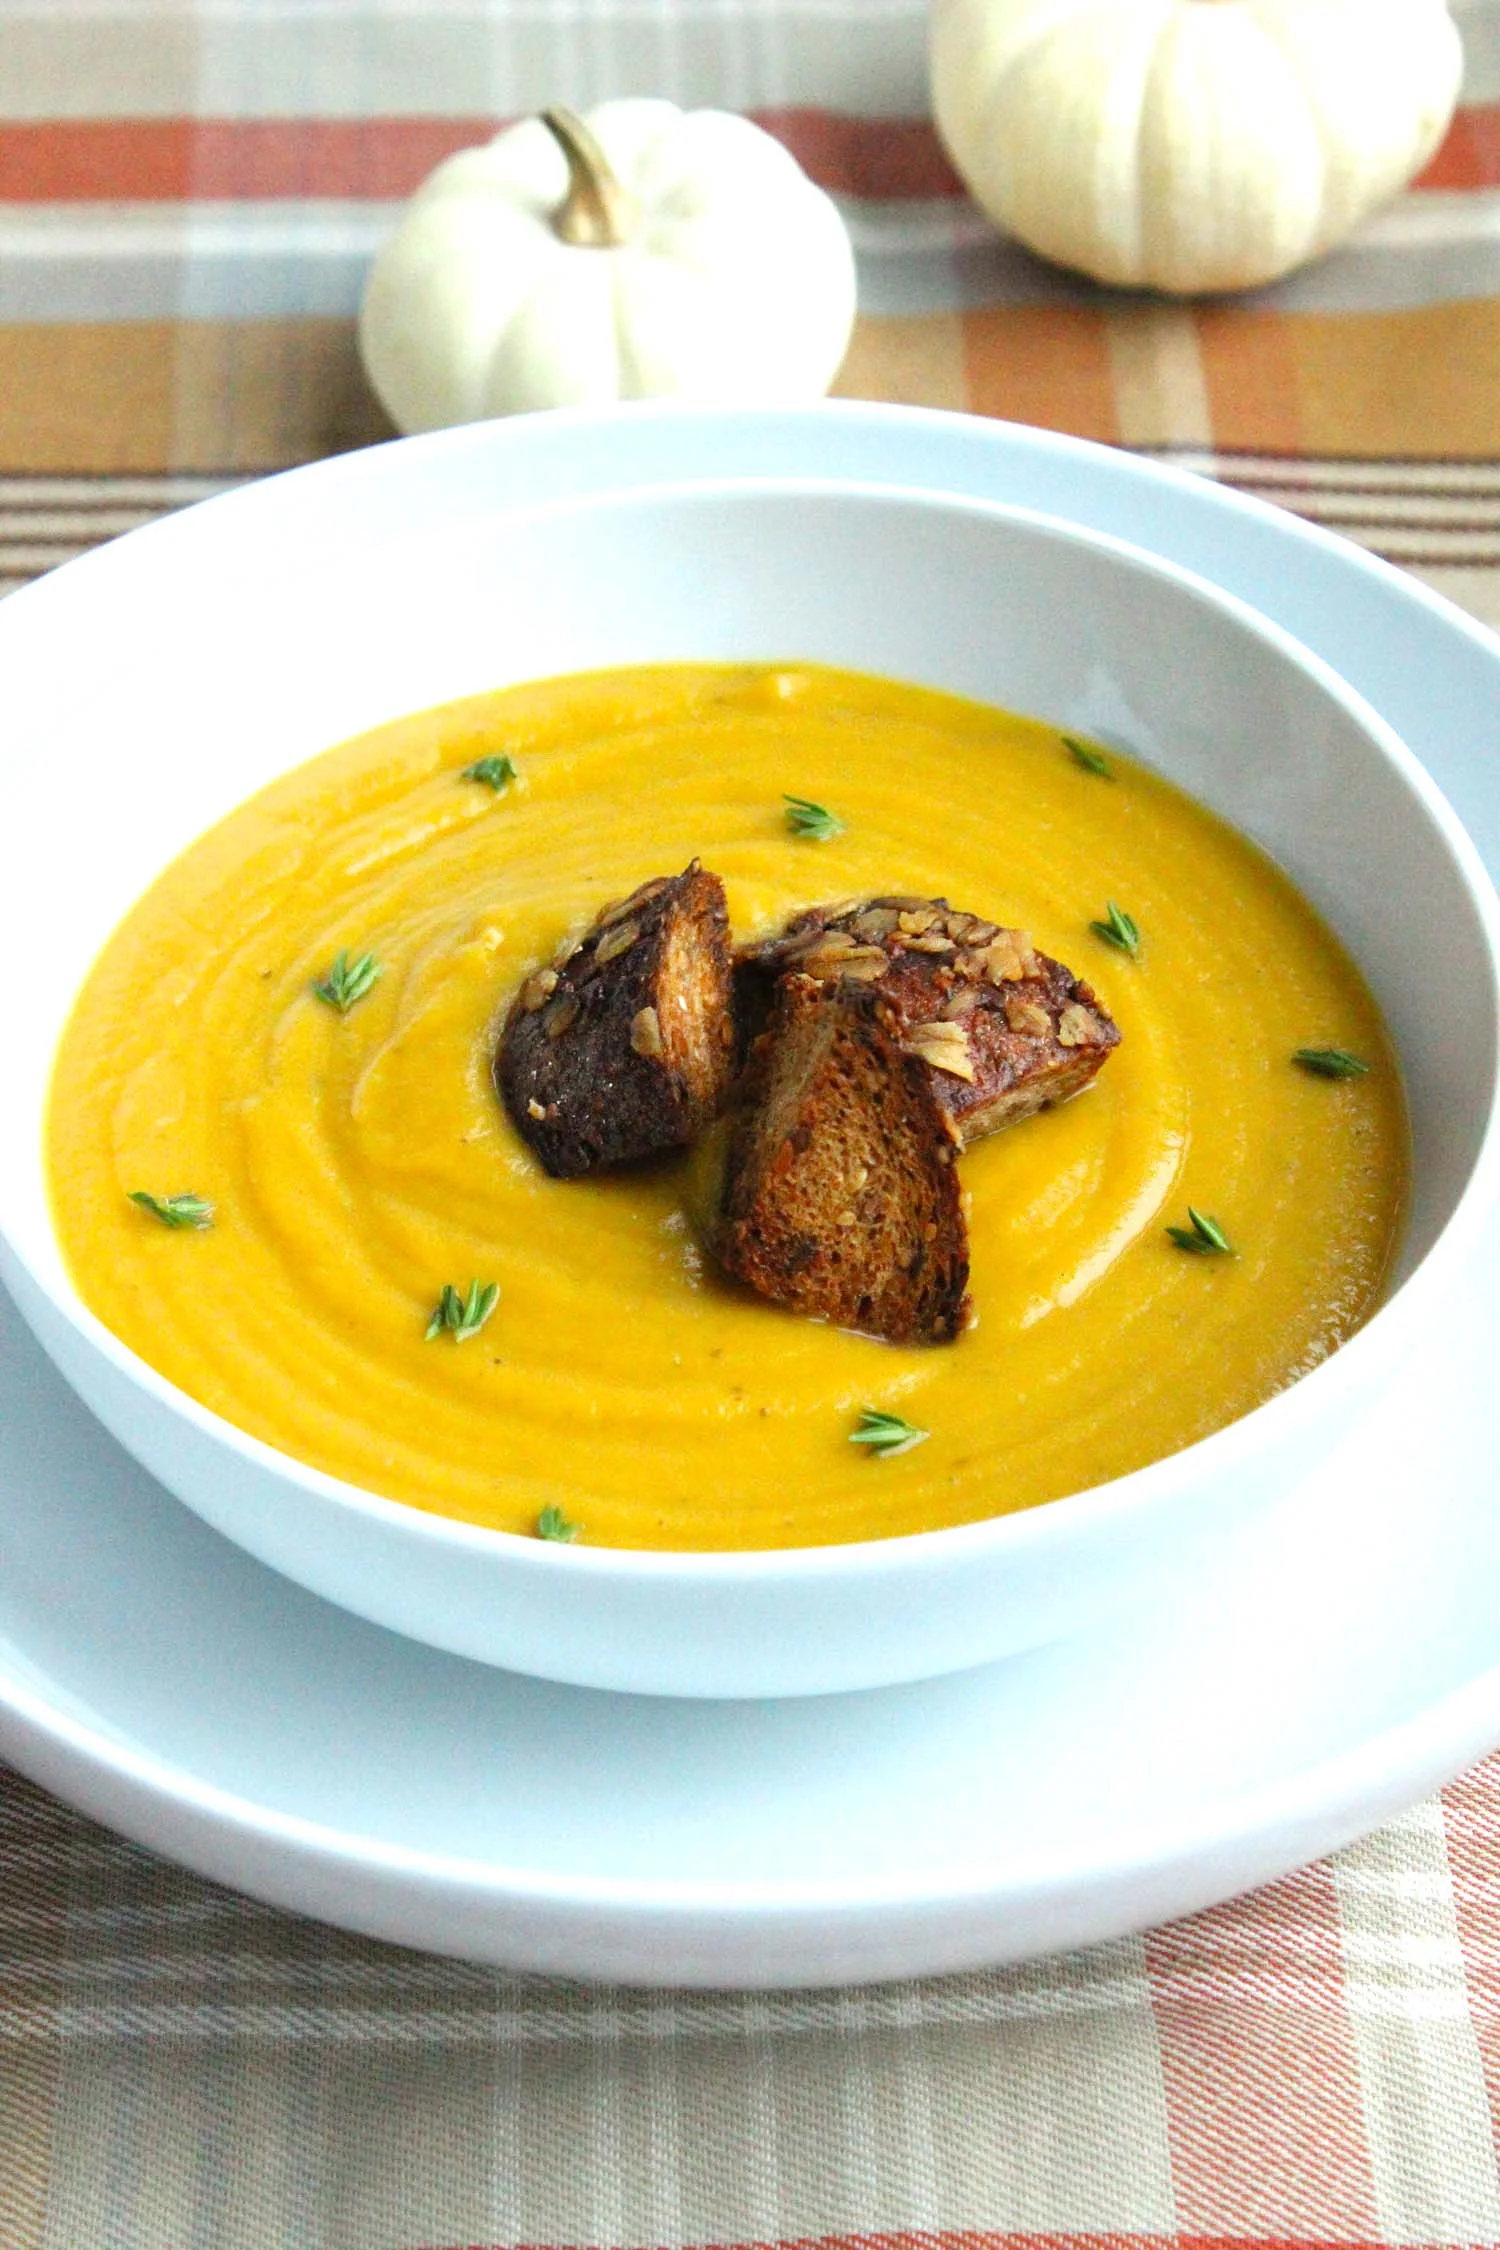
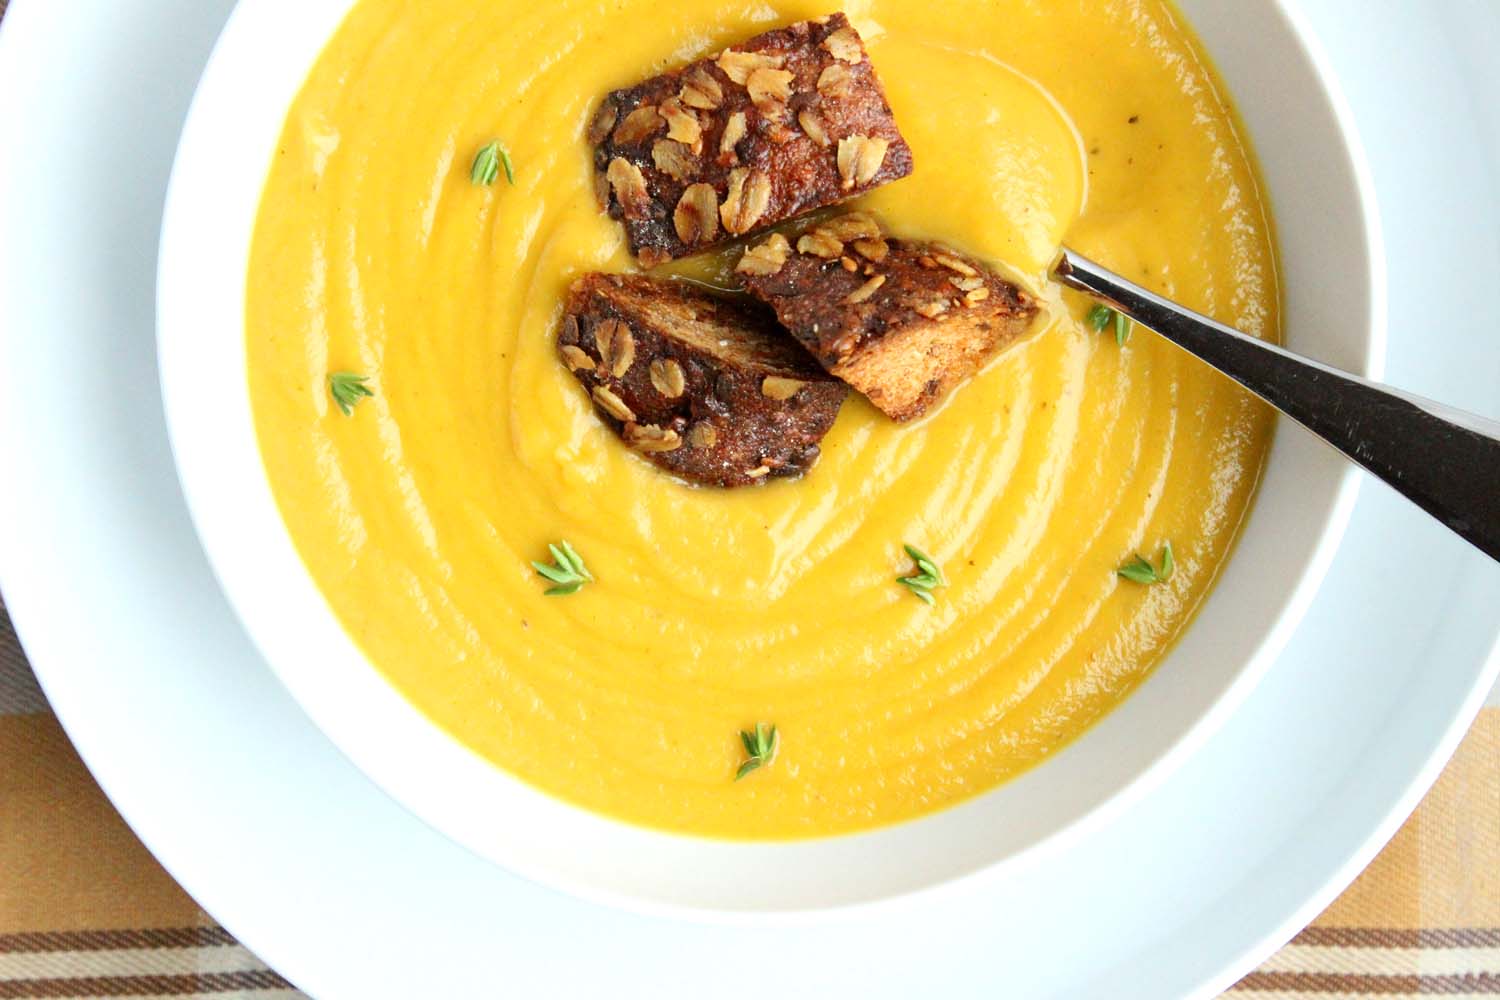
9:45 – Ina is making Winter Squash Soup as a gift to Dylan. She says it’s inspired by a French dish – soup au potiron, essentially a pumpkin soup.

10:11 – Rather than using fresh pumpkin, Ina is using some butternut squash and canned pumpkin (not pie filling.)

11:26 – We’re back to Dylan who’s making a cookie tin Halloween-ish with decoupaged tissue paper and funky stickers. #crafty

12:48 – The finishing touches on the soup will be some honey-white bread made into croutons. Pro Tip #3: Any bread can be toasted and made into croutons.

13:53 – It’s interesting to me to see when Ina uses an electronic tool and when she’ll do something by hand. I tend to avoid anything with a cord unless that’s really the only way, but I have no idea why.

18:30 – The day of Dylan’s visit has arrived and Ina is making one more type of candy for their wrapping party: White Chocolate Bark.

19:25 – Pro Tip #4: an easy way to temper chocolate is to melt a portion of it in 30 second increments using the microwave. Then add the remaining portion to cool it down and stabilize the mixture.

20:17 – I didn’t realize that tempering chocolate prevents that cloudy bloom, but Ina says that this process will keep it shiny.

21:32 –The chocolate is melted but still soft and now Ina is adding toasted pistachios, chopped apricots, and dried cranberries. Yum.

22:18 – Pro Tip #5: Choose ingredients that both look pretty and have flavors that compliment each other.

23:01 – Dylan is packing up her loot to bring it out to East Hampton and Ina is packing up the Winter Squash Soup and croutons to send back with her.

24:59 – Ina has cut the Homemade Marshmallows into squares and put a lollypop stick into each one and wrapped them in individual glassine bags ready to go for Dylan!

27:16 – Dylan has arrived an the assembly of the marshmallow-witch’s hat topiary is under way. I was all prepared to hate on this, but it actually looks pretty cool.

28:20 – Next up is the White Chocolate Bark, which Ina has cut into large squares. Dylan suggests placing two pieces back to back so that the pretty fruit and nut topping shows. Then they go into the tin with a few other treats and it’s good to go!

29:43 – Ina gives Dylan her soup take-out and after a sample of the white chocolate bar they agree, “that’s a wrap!”

Final Thoughts:
Ina’s right, a homemade gift really can be jazzed up with the right wrapping.

I have really never made candy of any kind, probably something to work on…

These packaging suggestions are cute, but Halloween colors tend to be tacky - maybe in autumnal golds and creams?

Homemade Marshmallows | Image: Laura Messersmith

Homemade Marshmallows | Image: Laura Messersmith

Lessons Learned:
I’m not normally one to make something easily purchased, but I also find candy and caramel making just a bit terrifying so Homemade Marshmallows seemed like a good entry point. Here’s what I learned along the way….

Sugar Syrup – Is really nothing to be trifled with, the temperature of molten sugar is very, very high so it’s important to be extremely careful when handling it and have your oven mitts at the ready. Add it very slowly and keeping the mixer on low speed until it cools a bit before ramping up to high – splattering hot sugar is not anyone’s idea of a good time.

Battling the Sticky – A rubber spatula coated with non-stick spray will be a godsend when it comes time to scrape the marshmallows out of the mixing bowl and into the pan. Trust. You’ll also find that confectioner’s sugar (aka powdered sugar or 10x) is your friend here and basically serves the same purpose flour does with pie crust. Don’t be shy and embrace the mess! Give both the pan and the top of the marshmallows a generous layer and coat the knife when cutting the squares. I’d recommend tapping the edges of the cut marshmallows in it as well to keep them from sticking to one another.

Prep & Timing – This is a recipe that rewards the organized cook who has her ducks in a row. Do have the gelatin and water mixed ahead, do prepare the baking pan in advance, do have your rubber spatula coated with non-stick spray before you try to scoop out the marshmallows.

Flavored Marshmallows – I came across this recipe in Southern Living a few weeks ago and now that I’ve got my feet wet with a vanilla version I really want to make some different flavors. If you have some extracts on hand this would be the time to get creative. Wouldn’t a cinnamon swirled marshmallow be so good in hot chocolate?

Homemade Marshmallows | Image: Laura Messersmith

Homemade Marshmallows | Image: Laura Messersmith

Small Kitchen Friendly?
Yes and no. A stand mixer really is pretty essential here, although if you had patience and a steady hand a strong electric hand mixer could work in a pinch. Beyond that I needed a medium sauce pan, 8x12 glass baking dish, rubber spatula, fine mesh sieve, liquid measuring cup, and measuring spoons. A chef's knife or bench scraper and a ruler will be helpful to cut the marshmallows into pieces. You’ll definitely need a candy thermometer or an electronic thermometer that can register 250 degrees or higher. Non-stick spray will be helpful too, even though the recipe doesn’t call for it.

The Verdict:
I felt a little like the Ghostbusters after the Stay-Puft Marshmallow Man explodes by the end of my Homemade Marshmallow adventure and I absolutely had that “A Marshmallow World”* song in my head the whole time, but the results were totally worth it. I’ve had what I’d term homestyle or artisan marshmallows before but these blew them out of the water. Incredible texture - sublimely light, tender, fluffy - with a lovely sweet vanilla flavor. I’m pretty sure one of these would be awesome in everything from hot chocolate, to coffee, to apple cider, and I can’t wait to make them in more flavors too!

*I gave you the Dean Martin/Frank Sinatra duet from 1967 where they’re both preeetty ‘toasted’.

Homemade Marshmallows | Image: Laura Messersmith

Homemade Marshmallows | Image: Laura Messersmith

Country French Omelet

Country French Omelet | Image: Laura Messersmith

Country French Omelet | Image: Laura Messersmith

Each week I follow along with Ina Garten (aka the Barefoot Contessa) and attempt to recreate one of her dishes in my tiny New York City kitchen. The catch? This is my version of cooking school and I’m making these recipes for the first time. I’ll share both my successes and um, challenges, along the way and we’ll see if I can keep up with the Contessa!

Episode: “Post Cards from Paris”

The Set-up: Ina and Jeffrey are channeling their trips to Paris via a French-themedstaycation.

The Menu: Country French Omelet, Double Hot Chocolate, Veal Chops with Roquefort Butter, Potato Basil Puree

0:47 – Ina and Jeffrey’s routine when they go to Paris is to drop their bags and go immediately to Café Varenne for the Country French Omelet. Sounds good to me!

1:02 – The recipe starts with sautéing thick-cut bacon (or lardon if you have access).

2:30 – Then the potatoes are cooked in the rendered bacon fat and I’m in heaven already.

3:18 – Ina says she hates making individual omelets, but this one is big enough for two so it works perfectly.

4:21 – Now that the bacon and potatoes are both cooked the egg goes into the pan and the filling is added back in. This seems like a hybrid of an omelet and a frittata, which is perfect in my book – no flipping required!

5:39 – Jeffrey arrives on the scene just as the omelet comes out of the oven and he correctly identifies the inspiration. Good memory! Now to divide the responsibilities on grilling & shopping, neither of which are his strong suit…

6:23 – At least he has a delicious breakfast to fortify himself for the day, and this might be the simplest recipe that involves actual cooking I’ve seen on this show.

9:42 – Moving onto the Potato Basil Puree. Pro Tip #1: involves blanching and shocking the fresh basil will help set the bright green color. Tricky.

10:17 – Now a little trip down memory lane to visit the Bistrot de Paris where potato puree is standard issue with many dishes.

11:29 – Pro Tip #2: Use an electric hand mixer to get really light, fluffy mashed potatoes.

12:03 – Only Ina could mix pale green cream into mashed potatoes and not have the entire bowl look like pea soup.

13:44 – Jeffrey is off to the wine shop to get advice from Jack on what to pair with their dinner. Jack suggests several from the Rhone valley and Jeffrey chooses the one that shares its name with the Marché de Raspail- Ina’s favorite Parisian market. Great job.

14:55 – The main course comes from Ina’s go-to butcher, Guilhien Jean-Bernard on the Rue de Bac, where she often buys veal chops.

18:26 – Ina says this is meant to be a day-off, but how can that be when there’s a camera crew around? Best not to look to hard at the logic.

19:40 – Anyway, she’s out in the backyard grilling the Veal Chops with Roquefort Butter, while Jeffrey tries to redeem his reputation as a bad shopper by picking up a lovely surprise: apple tatin just like the one they have at Café de Flore. He’s so sweet!

20:15 – Pro Tip #3: if making a sauce is too much trouble, use a compound or flavored butter instead and put a piece or two on top of the grilled chops.

21:38 – Ina says she does several different kinds of compound butter, white truffle for a special occasion or mustard butter too.

22:59 – While Ina puts the finishing touches on the veal chops Jeffrey secrets the apple tatin in the pantry until it’s time for the big reveal.

23:12 – Dinner on the terrace as they channel Café de Flore, even more so when Jeffrey brings out dessert. They’re adorable!

26:35 – Switching gears to Ask Ina. Deborah is baking brie in puff pastry, but isn’t sure whether to remove the rind. Ina says the rind is edible, but recommends whole wheel of Camembert rather than a wedge of brie since it’s neater when baked.

27:41 – Andy is having a rough time with his coq au vin, it turns purple! Ina manages to tell him nicely that that’s what it’s supposed to look like thanks to the red wine.

28:24 – Chris is hoping for some recommendations on Parisian food markets. Ina says she loves the Marché de Raspail and La Grande Epicierie in Le Bon Marché department store.

29:50 – Alice is desperate for a recipe that will make hot chocolate like Angelina’s in the Rue de Rivoli. Ina has a suggestion Double Hot Chocolate for how to make it at home. Jeffrey reaps the spoils of the recipe demonstration. Winning!

Final Thoughts:
I love the idea of basing a menu around cafes they’ve visited in Paris, what a great way to relive a trip!

All of these recipes are quite simple, but perfectly highlight the ingredients.

I wonder if the Gartens need a helper on their next trip….?

Country French Omelet | Image: Laura Messersmith

Country French Omelet | Image: Laura Messersmith

Lessons Learned:
Is it nuts that I’ve never made an omelet? I’m not sure that this Country French Omelet fully counts, but at least I’m on the right track. Here’s what I learned…

Bacon – I’d recommend dicing the bacon a little larger than you’d think, somewhere between 1/3” – 1/2" inch wide across each strip is about right, since it will shrink a bit as it cooks.

Potatoes – Bless Ina for the skins-on note, no peeling required! Just make sure to dice them all about the same size. I’d recommend a small cubes about 1/3” square so that they’ll cook all the way through without burning on the outside. Remember all your sautéing lessons and resist the urge to crowd the pan. For this recipe a medium potato (baseball-ish sized) will fit nicely in a 10” sauté pan.

Cook Time – I made an individual portion with about half the called for potatoes and bacon; using 3 eggs in an 8” stainless steel sauté pan. Because the portion was a bit smaller I started the assembled omelet in the oven for 6 minutes, at about 7 minutes it was 90% set so I took it out assuming that the eggs would continue to cook a little as I snipped the chives. If you like your eggs fully set you’ll likely need to add 1-2 minutes to the overall suggested cooking time.

Omelet Plating – I was convinced that I’d be scraping this omelet out of the pan cursing eggs for being so darn sticky, but amazingly it came right out with very little help from the spatula needed. The combined power of bacon fat, olive oil, and butter I suppose– which PS: makes the bottom of the omelet incredibly delicious.

Country French Omelet | Image: Laura Messersmith

Country French Omelet | Image: Laura Messersmith

Small Kitchen Friendly?
1,000% This recipe is perfect for anyone with limited cooking equipment/space. I used an 8” stainless steel sauté pan (use a 10 inch if you’re making the full recipe), a medium cutting board, chef’s knife, small bowl, a table fork, and fish spatula.

The Verdict:
Ina’s Country French Omelet is one of those recipes that’s greater than the sum of it’s parts and elevates all of the ingredients. This is the type of recipe that’s perfect anytime of day – a little toast & jam at breakfast, maybe a small side salad at lunch, add a toasted tartine with Gruyere at dinner and it’s a meal. The fact that the ingredients are so simple that you’re likely to have them on hand at any point means that you’re no more than 25 minutes away from a delicious meal. Just the kind of effort most of us have at this busy time of year. Let all the choirs of angels sing!

Country French Omelet | Image: Laura Messersmith

Country French Omelet | Image: Laura Messersmith

Lemon Ginger Molasses Cupcakes

Lemon Ginger Molasses Cupcakes | Image: Laura Messersmith

Lemon Ginger Molasses Cupcakes | Image: Laura Messersmith

Each week I follow along with Ina Garten (aka the Barefoot Contessa) and attempt to recreate one of her dishes in my tiny New York City kitchen. The catch? This is my version of cooking school and I’m making these recipes for the first time. I’ll share both my successes and um, challenges, along the way and we’ll see if I can keep up with the Contessa!

Episode: “A Barefoot Thanksgiving”

The Set-up: Ina and Bobby Flay are testing recipes for the Thanksgiving dinner they’re co-hosting.

Ina’s Contributions to the Menu: Herb and Apple Bread Pudding, Sautéed Shredded Brussels Sprouts, Make Ahead Cranberry Sauce, Orange Honey Glazed Carrots, Lemon Ginger Molasses Cake

Bobby’s Contributions to the Menu: Smoked Whole Turkey, Eleven Layer Potato Gratin, Heartland Chopped Salad, Fall Sangria

0:53 – On a very special episode of Barefoot Contessa, Ina welcomes her neighbor, Bobby Flay, to the barn for a trial run of their Thanksgiving menu

1:10 – The theme of their dinner is centered on two rules – 1. traditional Thanksgiving dishes with the “volume turned up” and 2. The dishes are recipes that can be made ahead.

2:23 – We’re starting with Smoked Whole Turkey, which Bobby is preparing in a Big Green Egg smoker over hardwood charcoal and wet pecan wood chips. I assume he hauled that over to Ina’s place?

3:34 – We’re going back inside, and back in time to see Ina assemble the Herb and Apple Bread Pudding, which is based on a stuffing recipe transformed into a casserole. The seasonings start with sautéed pancetta, the traditional onions and celery, and large cubes of granny smith apple.

4:15 – Ina occasionally deglazes with sherry, which I’ve never tasted but Agatha Christie characters are constantly having a glass to steel their nerves. I wonder what the flavor is like?

5:41 – The toasted bread, savory custard and sautéed vegetables all go in a baking dish to sit together in the refrigerator overnight, then Ina bakes the stuffing before dinner. If you’re a fan of moister stuffing, but don’t like stuffing the bird this would be a way to have your cake and eat it too.

6:02 – Outside to Bobby who is brushing the turkey with oil, then sprinkling with kosher salt and pepper before putting the entire roasting pan and turkey into the smoker.

7:30 – He doesn’t say how many pounds the turkey is, but I’d guess somewhere in the 13-15 range.

8:46 – Bobby comes inside for the taste test of Ina’s Herb and Apple Bread Pudding shockingly, it passes muster and will make the cut. Whew!

12:20 – Ina and Bobby are simpatico when it comes to entertaining – no first course at Thanksgiving, and dinner is served buffet style. Apparently Ina hates have a table with a bunch of bowls scattered all over it. Who knew?

13:38 – Next up, Heartland Chopped Salad, which has kale, baby spinach, pears, re-hydrated cranberries, and wild rice. Bobby’s Pro Tip #1: Slightly over-cook the rice so that it puffs up and absorbs more of the dressing.

14:09 – So there is one thing Ina and Bobby disagree on: measuring. She measures everything, he eyeballs the ingredients in the dressing. But, lo and behold it turns out perfectly balanced!

15:31 – Now time to assemble all the components, and we get Bobby’s Pro Tip #2: to avoid over dressing the salad, drizzle a small amount of vinaigrette along the sides of the bowl. Then use tongs to toss the salad and push it into the dressing picking up a little at a time.

16:12 – Busted! Bobby almost forgot to add the wild rice, but Ina reminds him in the most adorable way “Is there rice in the salad?”

17:25 – Taste-test time! Ina says she doesn’t usually think to put a salad on the Thanksgiving buffet, but after one bite she’s moved on from testing into just plain eating. Nailed it!

22:40 – On to dessert and Ina has decided that pie is passé, so she’s serving Lemon Ginger Molasses Cake.

23:54 – This seems like a fairly simple cake, cream the butter and sugar, then add the flavorings, followed by the dry ingredients alternated with some milk.

24:13 – Ina’s reasoning for skipping pie seems to be more related to their soggy-bottom factor, as a result she’s pro-crisps/crumbles, or this cake which improves with time.

25:38 – Out to Bobby who is preparing to baste the turkey with chicken stock, apple cider vinegar, and honey. I have conflicting feelings on basting – doesn’t that make it difficult to get crispy skin?

26:49 – Time to frost the cake and Bobby is getting a little lesson in whipped cream making. This one is stabilized with some crème fraîche which he doesn’t bother to measure. Natch.

27:41 – These two are totally in synch – same whipped cream (soft, but holds it’s shape if you’re curious) and garnishing preferences.

28:52 – Taste testing time where Bobby reveals that he pretty much only runs so that he can eat (Amen.) and then fends Ina off from having any more of his piece of cake (so hard to share!)

Lemon Ginger Molasses Cupcakes | Image: Laura Messersmith

Lemon Ginger Molasses Cupcakes | Image: Laura Messersmith

32:07 – Buckle-up kids, this is a double episode and now we’re on to part two. Next up: Eleven Layer Potato Gratin. Bobby admits, that much like his measuring the “eleven layers” are more a guideline/clever name

33:16 – Ina is on to Bobby’s game – thinly sliced potatoes (russet) alternated with a drizzle of heavy cream and a sprinkling of salt and pepper until it reaches the top of the baking dish – “this isn’t even cooking!”

34:24 – Essential: season every layer. The gratin is finished with caramelized shallots and crispy sage, but I would have liked to see some of those shallots in the layers.

35:33 – This would be a great addition to the menu, something that can be made ahead, is super simple, and requires almost zero fussing over. Don’t we all need a dish or two like that?

36:41 – Now Ina’s showing us how she makes Orange Honey Glazed Carrots in advance with no one the wiser. Tricky! The secret seems to be cooking them until they’re just al dente and then reheating them in a little olive oil on the stove top.

37:51 – Bobby’s basting the turkey again and he seems to be just as star struck as I would be. He can hardly believe he’s smoking a turkey in Ina’s back yard!

38:12 – Taste testing again (how many is this...?) and we get Ina’s Pro Tip #1: when re-heating, make sure to rehydrate (the olive oil) and check for seasoning, even though you seasoned during the cooking process.

42:18 – Onward and upward to the Sautéed Shredded Brussels Sprouts. Ina says she’ll shred the sprouts in advance using a food processor and then refrigerate them in a plastic bag until Thanksgiving day.

43:06 – Ina is intentionally making the Brussels sprouts on the stove top because “there’s so much going on in the oven…even if you’re smoking a turkey.” Yes! Such a great point and all the more reason to consider diversifying the cooking methods. This definitely counts as Pro Tip #2)

44:47 – The “supermodel of turkeys” appears to be done, but Bobby is going to check it in two places with a thermometer to be sure: Breast (155 degrees F) and Thigh (160 degrees.)

45:24 – Okay, I’ll say it. Bobby and Ina are really sweet together – so complimentary and respectful of each other’s styles! Such a love-fest there, no wonder they’re doing Thanksgiving together.

46:13 – Taste test complete and the Sautéed Shredded Brussels Sprouts are allowed to be on the buffet. Now for the finishing touches on the Eleven Layer Potato Gratin with fried sage and the sautéed shallots.

47:59 – Pro Tip #3: Sage (and fresh oregano) are really strong herbs, so use them sparingly to prevent overpowering the dish.

48:21 – Carving time!!! Step 1: Separate the legs and thighs from the body. Step 2: Divide the thigh from the drumstick. Step 3: Take the entire breast off and then slice across so that each piece has a bit of skin.

49:04 – Fun Fact: Ina’s dad was a surgeon and was a champion turkey carver.

54:36 – Ina and Bobby are continuing their test-run Thanksgiving and it turns out that Ina has even tested the table setting. #prepared #formerGirlScout (?)

55:15 – She’s using a round table with a white table cloth, burlap overlay, white plates, and a floral centerpiece in a hollowed out pumpkin. Bobby seems relieved that she took that job on.

56:29 – And, because Ina is awesome she has also made Make Ahead Cranberry Sauce with fresh cranberries. She and Bobby do a little ribbing over those who prefer the jellied kind, but there’s a reason it’s a classic!

57:48 – Cocktail hour is next with Bobby’s Fall Sangria involving a cinnamon simple syrup, fresh pomegranate, apples, oranges, pears. The best part: it improves with time, so making it ahead benefits the final product. Winning!

58:32 – Now to boozy part as they “layer the liquor” with a red table wine, pear brandy, apple brandy (aka Calvados), and then regular apple cider.

59:50 – Taste test time with a batch Bobby made a few days ago and since they’re done testing now it’s full glasses and cheers to the “best thanksgiving ever!”

Final Thoughts:
Ina and Bobby are so right about cooking in advance – isn’t it nice to have a lot of the heavy lifting out of the way so you can enjoy your guests?

Yes and amen to spreading the work across the stove top and the oven – how else could everything be hot at the same time?

Oh, to be a fly on the wall after that second glass of Fall Sangria… Hope Bobby has a DD for the ride home!

Lemon Ginger Molasses Cupcakes | Image: Laura Messersmith

Lemon Ginger Molasses Cupcakes | Image: Laura Messersmith

Lessons Learned:
I don’t make many cakes or large desserts in general, mainly because with only two people to eat them we either have waaaay too much of a good thing, or they go stale on the counter. At least with cake I can usually re-portion into cupcakes, suitable for sharing. I decided to make the Lemon Ginger Molasses Cake in cupcake version, here’s what I learned along the way.

Recipe Notes – I’ve come to appreciate a well-written recipe that anticipates the pitfalls and concerns of the home cook. Ina, of course, knows to warn you that the cake mixture might appear curdled, and in so saying reassures you that all will be well.

Cupcake Portioning – I used a cookie scoop to help me roughly measure the amount of batter per space in the muffin tin. If you’d like to avoid a literal muffin top, then fill with batter about 2/3 full – for me that was 2.5 scoops. If you don’t mind a little spill over the edge of the muffin liner, then 3/4 full or 3 scoops will work.

Cupcake Baking – Since this recipe was originally written for a whole cake, I had to guesstimate the cooking time for cupcakes. The 3/4 filled cupcakes needed 25-27 minutes to spring back in the center; the 2/3 full cupcakes only needed 22-24 minutes. When fully baked, the texture is quite fluffy and almost spongy in texture.

Frosting – Again, a little adaptation was needed here because I needed to frost them the day before but whipped cream isn’t something that can be made more than 24 hrs in advance. I went with a make-shift butter cream instead following the spirit, if not the letter of Ina’s recipe. My version is below if you want to try it for yourself. One of these days I’ll get a piping bag and learn how to frost, for now you’re stuck with my “old fashioned” look.

Make-Shift Whipped (Butter) Cream Frosting (yield: scant 2 cups, enough for 12 cupcakes)

Ingredients:
8 tablespoons room temperature butter
2 cups confectioner’s sugar
1/4 cup heavy cream
1/4 teaspoon kosher salt
1/4 teaspoon pure vanilla extract

Instructions:
Place the softened butter in a large mixing bowl and sift the confectioner’s sugar over the top to remove any lumps and add in the kosher salt. Beat together on low speed with an electric hand mixer until mostly combined.

Pour in the vanilla extract and then add the heavy cream a tablespoon at a time until the mixture is smooth and very thick, but still spreadable. The frosting should be fluff and hold it’s shape when spread with an offset spatula.

Frost fully cooled cupcakes. Frosting will stiffen and set up slightly, but remain soft underneath.

Lemon Ginger Molasses Cupcakes | Image: Laura Messersmith

Lemon Ginger Molasses Cupcakes | Image: Laura Messersmith

Small Kitchen Friendly?
Yes. For the cake I used a large mixing bowl, electric hand mixer, two muffin tins, dry and liquid measuring cups, small cutting board, mesh sieve, chef’s knife and a rubber spatula. A small cookie scoop helped with portioning, but isn’t essential. For the frosting I washed and re-used the mixing bowl, hand mixer, measuring cups and sieve, chef’s knife and small cutting board adding in a small off-set spatula. Muffin liners will help make sure the cupcakes come out of the tins.

The Verdict:
I’m a chocolate lover, so while cake of any kind is tempting I’d usually put something spiced or god forbid, carrot cake, at the bottom of the list. That is until I tasted Lemon Ginger Molasses Cake. Ina has really out done herself with this one – it’s deep and dark with gingery spice, the sweetness tamed with just a hint of lemon and the bitterness of molasses. It was seriously hard not to help myself to seconds. This would be perfect for a holiday party or wintery celebration. Outstanding.

Lemon Ginger Molasses Cupcakes | Image: Laura Messersmith

Lemon Ginger Molasses Cupcakes | Image: Laura Messersmith

Roasted Vegetable Soup

Roasted Vegetable Soup | Image: Laura Messersmith

Roasted Vegetable Soup | Image: Laura Messersmith

Each week I follow along with Ina Garten (aka the Barefoot Contessa) and attempt to recreate one of her dishes in my tiny New York City kitchen. The catch? This is my version of cooking school and I’m making these recipes for the first time. I’ll share both my successes and um, challenges, along the way and we’ll see if I can keep up with the Contessa!

Episode: “Barefoot Classics”

The Set-up: Ina is revisiting some favorite recipes from her years running The Barefoot Contessa specialty food shop.

The Menu: Easy Sticky Buns, Mustard Chicken Salad, Roasted Vegetable Soup

0:53 – A quick overview of the Barefoot Contessa days, and then it’s on to Ina’s new version of the sticky buns they used to make.

1:20 – These are called Easy Sticky Buns and already I can tell that they’re going to be dead simple, no yeast dough required. Instead it’s defrosted puff pastry.

2:34 – Ina says when she first thought of using puff pastry, she was worried that they might not be as good as the original, but now she thinks they’re even better, which is convenient…

3:15 – So far the ingredients have been butter, sugar, pecans and puff pastry so we’re off to a great start.

4:37 – Note to self: make more puff pastry-based items.

5:09 – Buns are assembled and baked which means it’s time to cue Jeffrey to arrive and try to abscond with as many sticky buns as he can. His allotment on camera: one.

6:42 – I’m not sure it’s possible to eat a sticky bun without ending up a little sticky and so far it’s getting the best of Jeffrey.

9:03 – Moving on to the promised Mustard Chicken Salad. Interesting, I didn’t realize that this would actually be a salad, with cherry tomatoes and broccoli

10:46 – Hmm, blanching and shocking are not my favorite techniques – kind of a pain

11:21 – Ina says she like the flavor but not the texture of mayonnaise, so she always thins it a bit with chicken stock or white wine to make more of a sauce.

12:55 – I’ve used Ina’s technique of roasting the chicken for chicken salad before and it’s really really good. Pro Tip #1: Roasting chicken with the bone-in and skin on keeps the meat really moist.

13:59 – She says they used to make “huge vats” of Mustard Chicken Salad – I wonder if she’s having a traumatic flashback.

14:04 – A little tarragon to add another layer of flavor and it’s time to serve! Ina suspects that Jeffrey will remember where this is from…’

18:27 – Ina says they used to make “millions and millions of pounds” of roasted vegetables and that she can’t really think of any vegetable that isn’t better cooked that way.

19:48 – She’s over at the farm stand and decides to get a combination of root vegetables – sweet potatoes, parsnips, carrots and a butternut squash.

20:10 – Pro Tip #2: Cut all the vegetables in similar sizes so that they roast at the same rate.

21:29 – It’s comforting to watch Ina wrangle a butternut squash and realize that it’s tricky even for a seasoned professional!

22:36 – She’s roasting the vegetables at quite a high temperature: 425 degrees.

23:01 – Pro Tip #3: If you’re serving the vegetables as is, put them all in big groupings on one platter and season individually. The parnsips get sea salt, carrots get parsley, sweet potato gets a drizzle of maple syrup, and the butternut squash gets fresh pepper.

27:45 – Ina says the key to turning a profit in the specialty food business is knowing how to use the leftovers and in her case she wants them to taste better than the original dish.

28:14 – In this case, she’s turning the left over vegetables into Roasted Vegetable Soup and some extra brioche bread into croutons.

29:53 – The soup is pureed, croutons are toasted and Jeffrey has arrived to have dinner. So cozy!

Final Thoughts:
I’m dying to make the sticky buns, but the contrarian in me wants to fuss with the whole yeast dough process….

Ina’s point about leftovers certainly holds true at home too, and why waste perfectly delicious food?

It just occurred to me, if Jeffrey eats well now imagine the BC days when there was an entire shop full of freshly prepared items.

Roasted Vegetable Soup | Image: Laura Messersmith

Roasted Vegetable Soup | Image: Laura Messersmith

Lessons Learned:
I’ve roasted vegetables and made soup many times before, but Roasted Vegetable Soup is the ultimate in my book: a pureed soup based on a variety of roasted vegetables sounded amazing. Here’s what I learned.

Vegetable Prep – Time to get familiar with your peeler and chef’s knife! We’ve talked about this before, but this is a great opportunity to practice your knife skills and take care to cut the pieces a consistent size. It will help the outcome of the soup since the recipe calls for roasting different vegetables simultaneously.

Vegetable Roasting Time – Which brings me to my next point. Ina in her infinite wisdom has selected dense vegetables that all roast at the same temperature for the same length of time. Brilliant. As I’ve cooked more and more I’ve internalized the cooking times, but it’s always helpful to have a reference handy – so I put together the chart below.

Flavor Combination – The recipe calls for carrots, butternut squash, parsnips, and sweet potatoes to be roasted and then pureed together. I wondered if in the end it would be too sweet, but actually the flavors blend beautifully and the crisp croutons make a great counter point to the smooth soup. Lovely in its simplicity.

Roasted Vegetable Soup | Image: Laura Messersmith

Roasted Vegetable Soup | Image: Laura Messersmith

Small Kitchen Friendly?
Yes. I used a large cutting board, vegetable peeler, chef’s knife and large spoon to prep the vegetables. I also needed two rimmed baking sheets (aluminum foil or parchment paper optional), a spatula, 5.5 qt French oven, and a blender. A food processor, food mill, or stick blender would work just fine too.

The Verdict:
Roasted Vegetable Soup is perfect for late fall. We had it for a weekend lunch served with a green salad and a few pieces of cheddar cheese and crisp apple slices for a hearty and satisfying meal. I went with multigrain croutons for a rustic touch instead of brioche or challah. Either way, this soup is simple, healthful, and easy to whip up a big batch to have on hand or to make use of leftover odds and ends. It’s also a gorgeous color and would make an excellent starter for a more formal Thanksgiving feast.

Roasted Vegetable Soup | Image: Laura Messersmith

Roasted Vegetable Soup | Image: Laura Messersmith

goldfinch and scout guide to roasting vegetables